house post · Uncategorized

House Post: Trees Are Expensive

When we bought out house, it had stood vacant for quite a while – I believe as long as two years. The previous owners had moved out, since they were elderly and downsizing. Mostly, this was fine. They obviously did a decent job of managing it.

One area where this caused problems was in landscaping. They had someone mowing the lawn, but the back half of our lot is wooded – and there were a lot of trees that were either dying or dead.

In the three years we’ve owned the house we’ve had four trees come down – two of them into a neighbor’s yard. We have 3/4 of an acre in a crowded city area. (“Crowded” for a rural Vermont city of 9,000, which actually makes it among the top five biggest cities in the state, we’re tiny, okay?)

Obviously that’s not a good number, and there were still trees or tree limbs that did not look good to my (highly inexperienced) eye, so a number of weeks ago I called a tree service to come out and look everything over. They identified three trees to be worked on and then also suggested we have them trim back bushes & trees away from one side of the house.

This week, they came out and did the work. For lots of money. But the peace of mind of not having more trees to fall in our neighbor’s yard and/or on power lines is worth it, right?

IMG_4419

The biggest (physically and $$$) problem: a number of limbs on this huge Norway Maple were diseased or dying, and they hung over our driveway.

I don’t have a picture of the second-biggest problem, a tall dead tree in our back lot, you’re just going to have to take my word for it.

IMG_4416

Crabapple tree in the backyard that needed desperately to be pruned.

IMG_4420

And the far side of the house, very overgrown.

It took the crew a full day, but they cleaned everything up.

IMG_4425

IMG_4430

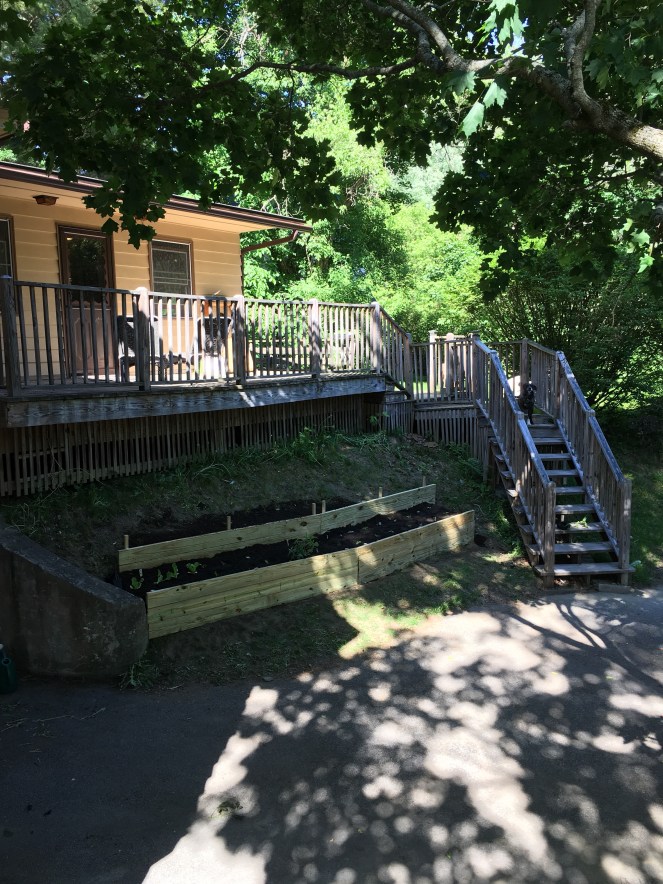
The first is taken from the deck, the second taken from almost the same spot I took the before picture – just a panorama instead of a tight shot on the tree.

IMG_4431

Back side from a different angle, because why be consistent?

IMG_4432

And here’s the back lot, which I realize is not terribly helpful without a before picture, but oh well. Imagine the tree that’s on the ground standing up instead.

The maple in the driveway will take some getting used to. I have high hopes that the bare spot on the bank – which was previously moss until I killed it all with some stuff I bought – will now take grass, both to look better and to help stave off erosion.

house post · Uncategorized

House Post: Dining Room

The dining room has been in progress for waaaaaaaaaaay too long. This past week and a half, I finally decided to channel all my frustrated energy from Tristan’s terrible summer into doing something, and that something turned out to be finally screwing up my resolve to push forward on the dining room.

To recap: the lower half of the dining room had a weirdly-low chair rail, with horrible textured plaster underneath that. I dithered a lot about how to deal with this and eventually decided on skimcoating.

So, this past week, I’ve devoted between 15-30 minutes a night to hard labor, and have finished the first plaster pass at skimcoating the textured plaster away.

IMG_4199

It’s frankly sucked. I’ve split it up into sections, but it’s a lot of hard upper-body work. The process is to layer on plaster as thinly as possible, but not to worry too much about slight ridges.

Then, do a rough hard sand with 80 grit sandpaper with the goals of sanding down those ridges. The idea was not to make it perfectly smooth – but rather to get an even top layer. Concave spots (bubbles, divots, etc.) will take care of themselves with the next plaster layer, but convex spots (build-ups, ridges, etc.) will not.

The guy who taught me how to plaster made me promise two things: always do three layers, and remember that you can fixed raised spots with sanding, but you can only fix sunken spots with plaster.

IMG_4230
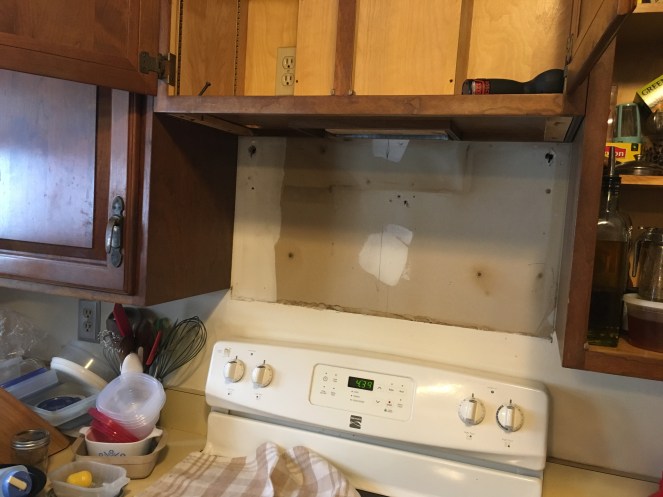
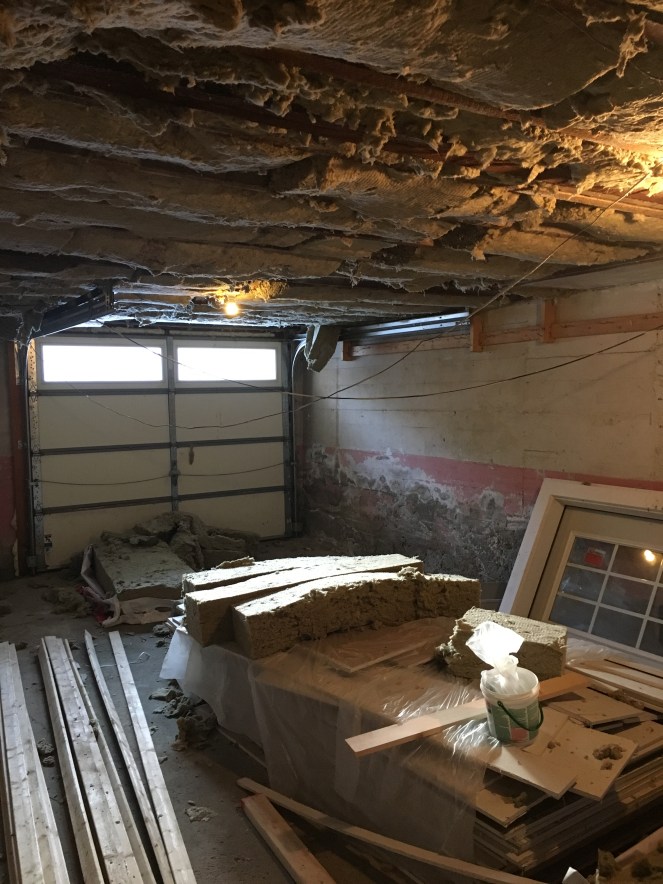
post-plaster, pre-sand
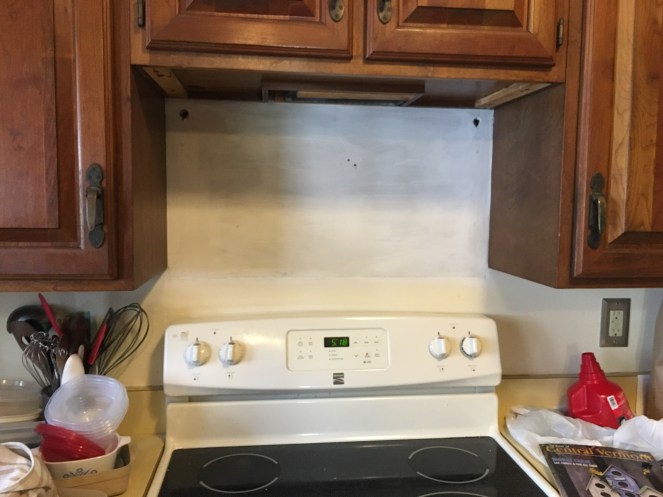
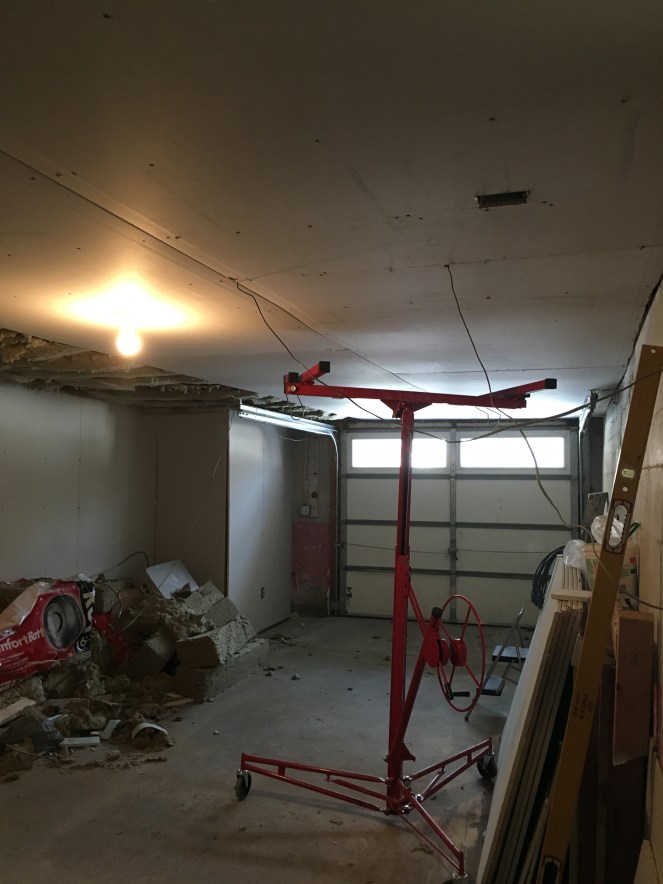
IMG_4220post-sanding

As of today, all of the first layer is done, and over the next week the plan is to do layer 2, which will be a lighter spreading of plaster with the goal of getting it smoother over the top. It was really hard to even try for smooth with the first layer, because the raised texture was so bad. Then a finer-grit sanding.

The last layer will be when the real work starts. That will be touch-ups of plaster and the finest grit of sandpaper and/or a sponge. I’ll spend a lot of time squinting at the wall in raking light and making sure it’s as smooth as absolutely possible, since any defects will be glaringly obvious once I paint.

Then, once the plaster is done, I’ll either paint or re-install the new chair-rail. Honestly not entirely sure which one I should do first. I’m leaning towards the chair rail, since a) it, too, will need to be primed along with the walls and b) it will be the same color as the lower half (a pale cream). I’ve picked it out, at least, after several trips back and forth to the lumber yard.

The push goal is to have this done by September, so that in September we can move on to the living room. Which will be a beast of a project, but who knows, I could still be out of the saddle and in need of a project…


house post · Uncategorized

House Post: Kitchen Curtains

I think I’ve finally figured out what to do with the kitchen curtains.

IMG_4197.JPG

Yeah, they’re pretty ugly right now. Or classic. Depending on how we’re viewing this particular moment in design history. Either way, they’re something. And it’s time for them to go.

I’ve dithered quite a lot and I think I have a final plan.

A lot of the curtains for sale in even vaguely modern styles aren’t the right fit.  Or they’re kind of expensive.

So, I think I’m going to make some, but here’s my debate.

Should I make just a set of valances?

Image result for window valance
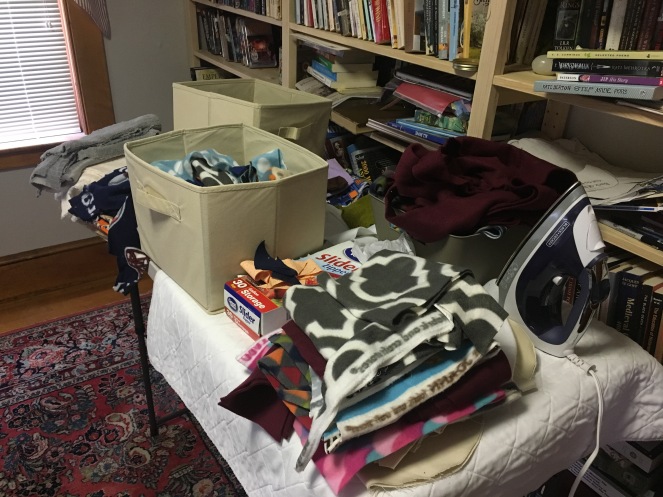
not this pattern, but something like this

Or should I go more along the lines of what’s there, with a valance + side treatment?

Image result for kitchen window treatments
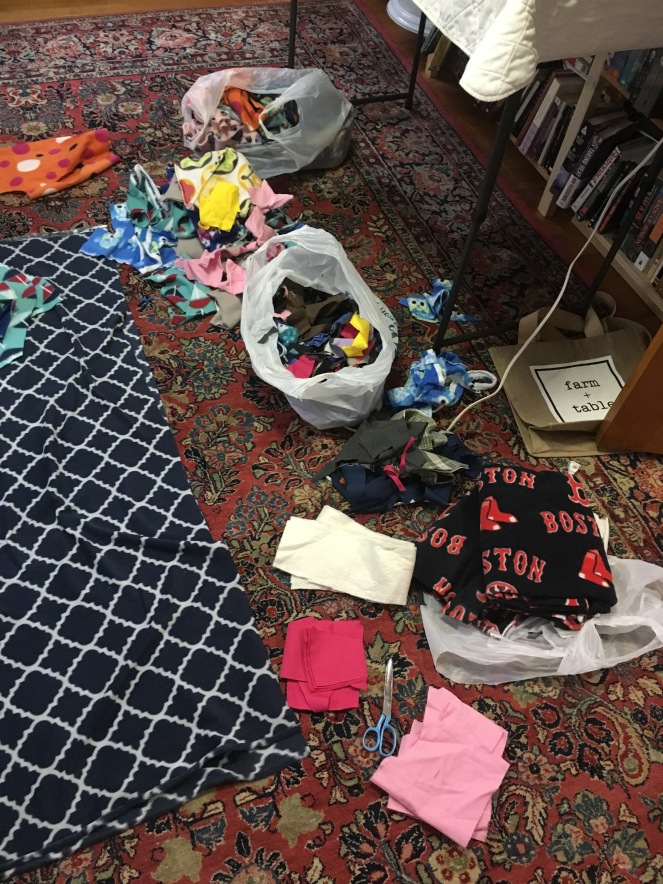
suuuuuuper ugly but you get the idea

I suppose there’s always the third way of removing them and going without curtains entirely.

Well, any thoughts?

house post · Uncategorized

House Post: How do you clean your hardwood floors?

It’s been a while! Work on the house has been crawling along very slowly lately, as I focus on taking care of Tristan and working on business development for Bel Joeor Metier. What I have been doing a lot of is cleaning: really deep cleaning, like the other day I went after the toaster oven with a toothpick.

Earlier this week, I did the master bedroom floor, which of all the exposed wood floors in the house gets the most traffic. As we hopefully will be ripping up more carpet in the near future, I wanted to ask those of you who have wood floors how you take care of them.

20e34-152b-2b10

bedroom floors when we first uncovered them ❤

My regular routine is a tiered one. On a more regular basis, I vacuum, just to take care of the endless drifts of cat hair. When I want to dig in a little more, I’ll use a dry swiffer after vacuuming to get the last little bits of dust.

What I did to the bedroom is something I do maybe every six months, but feel like maybe I should do more? I start by getting everything up off the floor, and then vacuum. Then dry swiffer.

Then I do a round of mopping, and in this I use Murphy’s Oil Soap, diluted in warm water. I scrub any spots that seem especially dirty, and I only do maybe 3 square feet at a time, rinsing out the mop in between. I use just a plain old sponge mop.

Murphy Oil Soap, Original Formula 16 fl oz (473 ml)

Then I leave that to air-dry, which usually doesn’t take too long – I don’t put a lot of liquid down, and am careful to wring the mop out. I use that time to clean out the mop quite thoroughly, and usually go do another chore.

IMG_4101

Once the floor is dry from that, I use the damp clean mop and do a polishing agent – lately it’s been Orange Glo 4-in-1, but I’ll be honest: I picked that after reading all the ones at the grocery store and that one seemed like it would do the most good for the best price. I haven’t been unhappy with it – but I am always curious if something would work better.

The whole process takes about two hours. I adore the hardwood floors, and want to keep them in as good shape as I possibly can, so I work pretty hard at this. I can’t shake the feeling, though, (major insight into my brain coming) that I’m not working as hard or as smart as I could be.

If you have hardwood floors, how do you care for them? Especially interested in hearing from people who have one or any of the following factors: old houses, absentminded husbands/partners, pets.

house post · Uncategorized

House Post: Terracing the Herb Garden

Finally some real, visible, substantial house progress!

Ever since we’ve moved in, a particular small hill underneath our deck has distressed me. It’s useless. It grows nothing but weeds. It’s a nightmare – even borderline dangerous – to mow. Now, that describes a good chunk of our yard, but this small, discrete piece was something I had a clear plan for from day 1.

img_3468

Last weekend, we finally did it! And WOW, I am so pleased. For an investment of about $250 (lumber, topsoil, plants) and 8-10 hours of time, I have a terraced kitchen herb garden!

Step 1: we actually spent the most time working out our process. As you can see in the photo above, it involved some temporary stakes and strings to get a straight line.

img_3473img_3470

Along that line, we cut out a small-ish ledge with a shovel (not even that much, honestly; I purposefully didn’t want to do too much cutting into the hill to keep the integrity it had) and then leveled off the bottom board in it.

img_3472img_3476img_3480

Then we drove in stakes – 36″ tall, so they’re in the ground to a depth of about 18″. We cut them out of lengths of pressure-treated 2×2″ balusters. We started doing this with a hammer on Day 1, and then that evening I texted around seeking a sledgehammer, and the next morning a friend dropped one off and WOW YOU GUYS I LOVE SLEDGEHAMMERS SO MUCH. It was a night and day improvement over the hammer.

So we screwed the boards into the stakes, which was actually the easiest part. The hardest stuff was making sure everything was level, lined up, secure, straight, you name it. That part was important because it needed to start level and straight, because over time it’s going to get pressure from the dirt behind it.

Then we went straight back for level 2! These are 6″ boards, btw, so that whole three layer front row is 18″ tall. Not huge, but plenty of room.

img_3481img_3483img_3484

Ta-da! The next day we added the last boards to the top of that second row. Then we added in the topsoil and the (local, organic, natch) herb seedlings.

img_3492img_3493img_3503

The finally tally: three kinds of lettuce, catnip, lavender, basil (SO MUCH BASIL), parsley, rosemary, thyme, oregano, dill, chives, scallions, and then I snuck in zucchini in the top row because I ran out of room in the raised bed. (This picture was taken very late afternoon; the spot gets 8-10 hours of sun a day, and we may also need to remove the branch that’s blocking the light in that photo, so they should do just fine.)

img_3501

We put in the raised bed the same day, and boy, did I restrain myself. I usually waaaaaaay overplant it, but this year I remembered my the tomato blight wars of years past and gave them more space. So two kinds of tomatoes and bell peppers only in the raised bed this year. Next year, I’ll do another raised bed, and be able to expand a bit.

Here’s hoping it all survives and thrives!

house post · Uncategorized

House Post: Goodbye, microwave; hello, vent hood

We executed a long-anticipated kitchen project last weekend, with my dad’s help.

See, this is the microwave that was installed over the stove when we moved in.

IMG_2705IMG_2706IMG_2707

How amazing (and also gross/grimy/greasy) is that?!

It didn’t really work. Well, it might have worked. It didn’t work when we moved in. Then, after we lost power, it randomly turned back on. Which was vaguely terrifying, and so, we never used it as a microwave. We put another one in another part of the kitchen and called it good. We used the vent function occasionally but it sucked.

I looked everywhere for a replacement that would fit in the space. I spent hours and hours and hours googling, calling stores, scouring online forums, you name it. They just don’t make microwaves this small anymore, at least not in the precise way that I needed one. So I gave up on buying a new microwave and decided to swap it over for a vent hood instead.

Getting the old microwave out was a total pain in the ass. So many things in this house are overbuilt. The microwave was no exception.

IMG_2711IMG_2713

It took several hours, because first there was the microwave and then there was the microwave housing.  They were both stuck in from having been there for so long, overly securely attached, really heavy, you name it. It was a pain.

IMG_2716

Then, once we got it out, we found that they’d never finished off the wall behind the microwave. To say I was grumpy would be an understatement. So I had to prime and paint the stupid wall. I had nothing left of the actual kitchen paint, so I used a pale gray that is upstairs in the library. It’s a delineated space, so it actually works ok.

IMG_2717

Then, the vent hood went in!

IMG_2741

It’s pretty great. It’s less obtrusive than the microwave, actually functional, and it felt good to check something off the list.

I’m pondering backsplash for that wall. I haven’t decided yet. There is a kitchen remodel in the medium-future (maybe another 5 years) so I don’t have to make any final decisions.

IMG_2796 (Edited)

So far, I took one pass through Home Depot’s options and liked this one the best. I’m not going to decide or do anything until May, though, because my April is about to be not worth living with the finale of a major work project.

house post · Uncategorized

House Post: Fabric Organizing

You know you were taught to sew by a child of the Great Depression when you spend your Sunday morning organizing your fabric.

First pass was to put the untouched fabric together by type: fleece, cotton, flannel, other. At least the easily accessible yardage. Please note, to protect the innocent, I’m not showing you pictures of my craft closet. Maybe someday I’ll have the courage to share public photos of the before & after. If I ever get to an after. Assume what you’re seeing is 1/4 of my total fabric stash, aka the part that got organized today.

IMG_2603

Second pass was a thorough rifling through of mumblemumble bags of true scraps, the little bits leftover after I finished a project, that I just stuck in a bag and then stuck full bags in the closet. Yeah, I know. I’m atoning for my sins now.

IMG_2607

Those scraps got separated into four piles:

  • trash: the smallest, for truly irredeemable tiny shreds of cotton and other fabric;
  • usable scraps, cotton and flannel: the next-largest, for pieces that could be cut up for quilt squares
  • unusable scraps, fleece and flannel: the second-largest, for any and all uncuttable fleece and flannel scraps, into a grocery bag to stuff into the dog bed
  • usable yardage: for anything that could have something else cut out of it, trimmed of hanging bits, folded, and fit carefully into a new box.

IMG_2610

Whew.

IMG_2612

I’m not done yet, but I have a system and the wind in my sails, and I’ll plug away at it for ~15 minutes or so a day. I also have a plan to better store the fleece yardage, which takes up the most room by far, and will execute that after a trip to the store to buy the right kind of tupperware.

house post · Uncategorized

House Post: Kitchen Sink Soap Dispenser

Quick but very satisfying project. Since we moved in, there’s been this weird fixture on the kitchen sink that I didn’t entirely understand. Close examination told me it wasn’t attached to anything and was just sitting there, so I pulled it out and swapped it for something actually useful: a soap dispenser.

It took maybe 15 minutes and $20 and is a substantial improvement, so I’m pretty happy.

IMG_2419IMG_2420IMG_2423IMG_2425IMG_2426

Best guess for what the heck it was goes to my sister-in-law, who thought maybe it was an attachment for an old standalone dishwasher.

IMG_2427IMG_2429

https://giphy.com/gifs/soap-5hktuFHDXRcKH35mbb

house post · Uncategorized

House Post: Garage!!!

Please allow me to express my true sentiments about this development.

https://giphy.com/gifs/books-tbr-to-be-read-T3o2jSO7mf7Ta

Yeah.

So, okay. It’s been a REALLY long time since I’ve posted a house update. The reason for that is simple: I haven’t really had anything to update. Winter has been eating my soul. I’ve been trying to launch a small business. I had profound existential angst about the projects remaining on my plate and their current stages.

Last week, I finally snapped, and I decided to throw some money at my longest-standing project: the basement.

When last we left the basement, we had put up strapping but still needed to do the drywall. Boy, was I dreading the drywall. Unlike the vast majority of the work I do, I would need a second pair of hands. So I lagged. Ignored. Made half-assed plans to bring my dad up to keep helping.

Last week, I called a contractor. He came and scoped things out. This week, he brought a friend, and you know what? He put up the drywall in my garage.

First, some before.

IMG_2288IMG_2289IMG_2290

And the after!

IMG_2297IMG_2299IMG_2298

AND FINISHED YESSSSSSS.

img_2317img_2323

Don’t worry my car got a bath the next day. And then the day after that? IT SNOWED AND I DID NOT HAVE TO CLEAN OFF MY CAR. IT WAS CLEAN. AND WARM. GLORY HALLELUJAH.

house post

House Post: Strapping in Basement

“Strapping” is just an inherently weird and kind of funny way to describe this particularly type of house work. The internet tells me that it’s a 16th century term, a derivation of the word “strop,” and could mean either a trap for birds or a piece of lumber holding two objects together.

We are using it in the latter context, on the ceiling in the basement garage. It’s the third-to-last step before having a finished garage in the basement, and I have every digit crossed that we are on schedule for a January completion.

So. Strapping. Basically: putting up pieces of wood on the ceiling to a) hold the insulation in and b) create a level, even, easy foundation on which to attach future pieces of sheetrock.

It’s actually a fairly straightforward process. Just grunt work. Occasionally difficult to reach up and hold for that long, but then you just have to use the nail gun and bam, it’s in. Once we get into a rhythm it’s pretty fast. The downside is that I can’t do it by myself, so I have to wait for my husband to help me, which means it’s part of a larger set of house project negotiations and I can’t just do it on my day off.

The first challenge was something my dad took care of: in one section of the basement, there were 2×6 beams instead of 2×8 beams. Why? Who knows. Reasons. It meant that before we added in the strapping, we had to basically add 2″ (actually less than 2″ because no one labels wood in its actual size WHAT IS UP WITH THAT?) to have something to attach the strapping to.

Yay that. While he was doing that, I finished doing all the other insulation. Then took a loooooooooong shower to get all that ick out of my hair. (Yes, I wore a hat and goggles and respirator and gloves…it still gets everywhere.)

Then, we did the strapping in the root cellar.

Very rare picture of me in action. I’m so sorry about the midriff. It’s a very old fleece and I am very long-waisted.

This weekend, we worked further on doing the main garage part. Once we finish that, time for sheetrock!