house post

House Post: The Man Cave Abides

My in-laws are up this weekend, which means huge progress on the man cave!

See: my husband does not do home improvement. He’s not that guy. He hikes and skis and plays video games and loathes anything like tools or work on the house. (Which is why these posts have been about what I do; I’m the one who works on the house 98% of the time.) His dad is the opposite of that guy, which means that when my father-in-law is here, so much shit gets done.

Last time, we ripped out the old insulation, old sheetrock, old ceiling, old floor, and put up new insulation, new vapor barrier, and new walls.

Then, when my dad came to visit, we replaced the old fluorescent lighting with recessed lighting.

In the interim, I have not touched it except to add spray foam to the gaps around the windows, because the space is my husband’s and I have loads of things to do in other rooms.

This past weekend we’ve put up vapor barrier in the ceiling, put up sheetrock on the ceiling, and done two layers of mud. One more layer of mud and we start primer!

Then, the remaining list for the space is: paint the walls, figure out the floor (some combination of carpeting + tile), put trim around the windows & door, and decorate.

a reminder of the before-before

where we left off on this blog
and following: this weekend!

house post

House Post: Reading Nook

Starting off with my goals of decorating! I’ve been slowly adding art to the walls of my office, and, drumroll, finally put up Tristan’s horseshoes.

Thank you, everyone, for your input on this!

I bowed to the wisdom of the crowd and took out the ice pads. That was not terribly easy, since they were nailed to the shoes, but I ran them under hot water for a while to soften the rubber and then tugged really hard.

Then I took a wire brush to the shoes and rinsed them in hot water repeatedly, then carefully toweled them dry. My bathroom might have looked like a murder scene from all the rust flecks and drops. I did not take pictures. You’re welcome.

Then: on to the wall!

I was originally going to put them straight up, but when I put one nail in and turned around after grabbing another I really liked the tipsy look! So they will stay tipsy until and unless I decide to straighten them out.
I also added another piece of decoration to the room thanks to a Target visit (a staple of every trip to Boston).

$3.00 in half-off Christmas lights! I have to get some hooks for the corners, because longterm these lights will go on top of the molding for the windows and thus around the entire top of the room, but they are fine hanging like they are for now.

So, the last finishing pieces for the office are:
– get cavalry posters printed & framed
– get curtains
– finish off wall behind radiator (you can see it in the bottom right corner of the last picture)
– reupholster reading chair (this is more like a 3-5 year goal)

house post

House Post: Midway

I count years for the house from the anniversary of our closing date, which was May 8, which puts us a smidge past the halfway mark through year 2. In my year 1 roundup, I listed things that needed to get done in year 2. So, where are we on that list?

– finish garage (and by extension, basement reorganization) 

Some small progress on the garage space, and on reorganization.
– gut weird back room and turn it into a man cave
HUGE progress! Not done yet, but probably/hopefully January.
– strip wallpaper and repaint: back bedroom, front bedroom, office, front hallway, nook area/game room
Nook area/game room is next, after the holidays, and front bedroom will depend on the tricky timing of not having houseguests for about 8 weeks straight…so after ski season. Maybe March?
Front hallway…we’ll see.
– conserve front entryway mural
Haven’t touched this, BUT a conservator friend will be here in late January / early February, so I am hoping to have her look at it then.
– sleeping porch: repaint, replace glass panes, finalize furniture arrangement there
Haven’t touched this.
– most remaining radiators stripped and repainted (will probably hold on sun room and living room for now)
Haven’t touched this. At this point, it will be a year 3 project because we can’t do this while the heat still needs to be on and it will definitely be on through May, ahahahahaha, Vermont.
– landscaping and yard, including some raised beds for gardening
General landscaping…meh.
– drainage work along the north side of the house to prevent flooding problems
Yeah no. Next summer, for sure.
house post

House Post: Recessed Lighting in the Man Cave

House work has been pretty darn slow, actually. I’m focusing on organizing before getting into any big new projects, and working through the “little things” list. I’ve been on a good roll lately of putting away 3 things each night, big or small, that have ended up in not the right place. Sometimes this is just tidying up, and sometimes it’s further organizing.

So this is a thing that actually happened a couple of weeks ago and not much has happened since. My dad and I put in recessed lighting in the ceiling to replace the old gross fluorescent lighting. It looks terrific. My husband and I have since pulled all the old staples from the ceiling and are ready to put up the vapor barrier…someday. With the arrival of winter weather, this room has become really awful to work in unless you turn on the space heater. So we’ll see when we actually get around to it.

I’ve also put in foam sealant around all the windows, so the room is just about as insulated as it can get until we work in the crawlspace.

house post

House Post: Dawn of the Man Cave

I don’t have anything like a coherent write-up for you, sorry. But I will share a before and an in-progress photo of the current project that is taking up all my free time: the conversion of a weird back room of the house to a man cave for my husband.

(I already have an office and a library/craft room, so it’s only fair!)

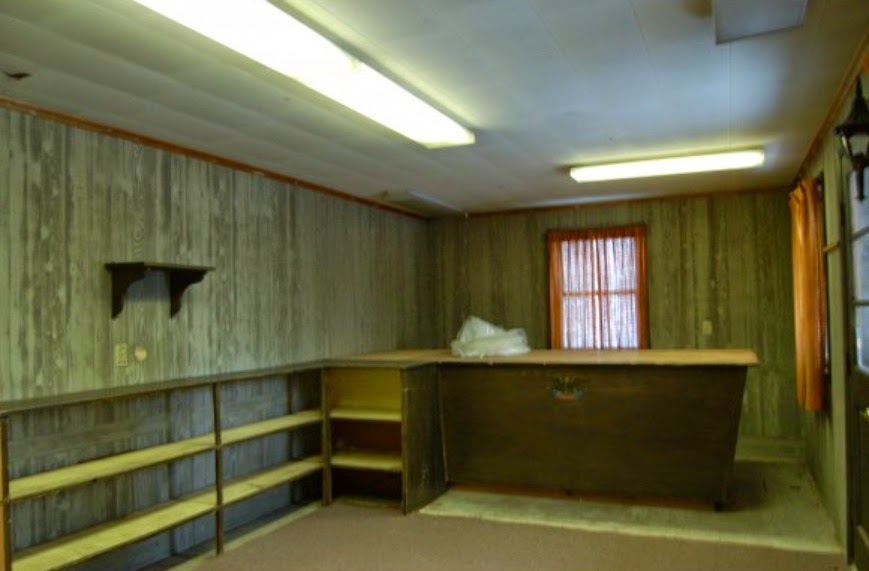
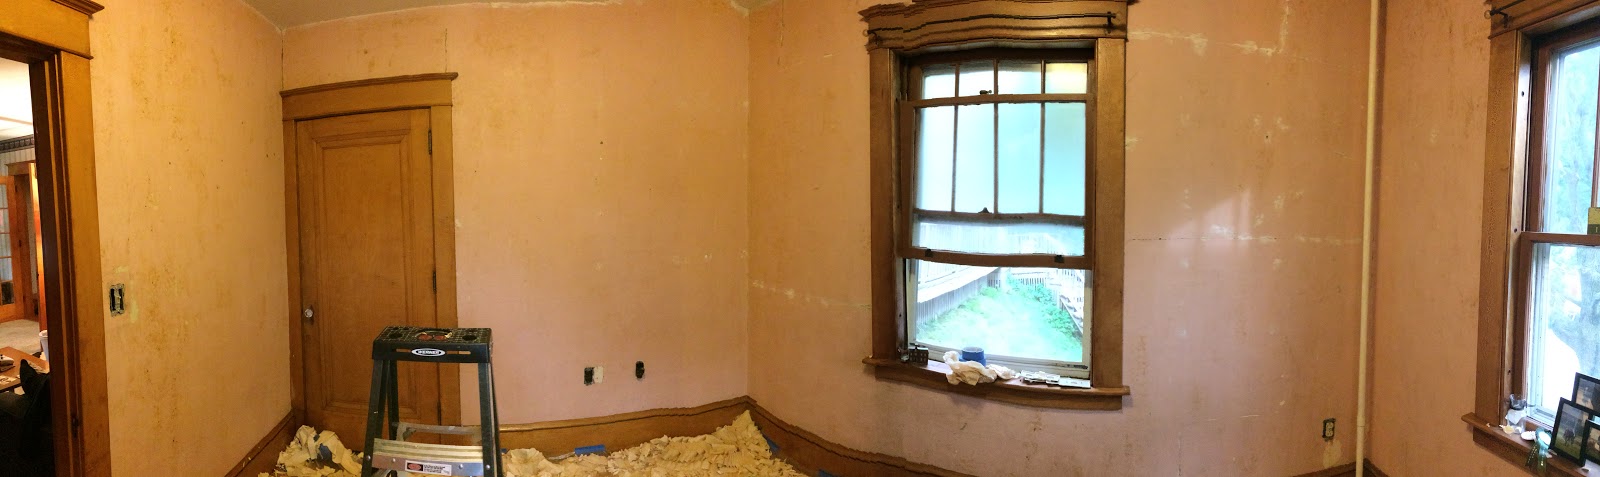
Here is the before, from the real estate listing.

Oh, yes.
What are you looking at?
Let me make you a list: a cardboard fake-drop ceiling, fluorescent shop lights, faux-wood particle board paneling, the ugliest curtains you have ever seen, a GIANT bar (5′ deep, 4′ tall, 10′ wide), asbestos tiles, and utility carpet.

Yeah.

It’s 12×20, so not a small space, and it’s the room by which we enter the house – the door you can see just at the right edge of this photograph goes out to the back deck and to the driveway. It has until recently served as a sort of dumping ground. My husband put a lot of his stuff back there but since it also had no heat source it wasn’t a terribly useful or comfortable room.

So, what have we done to it?

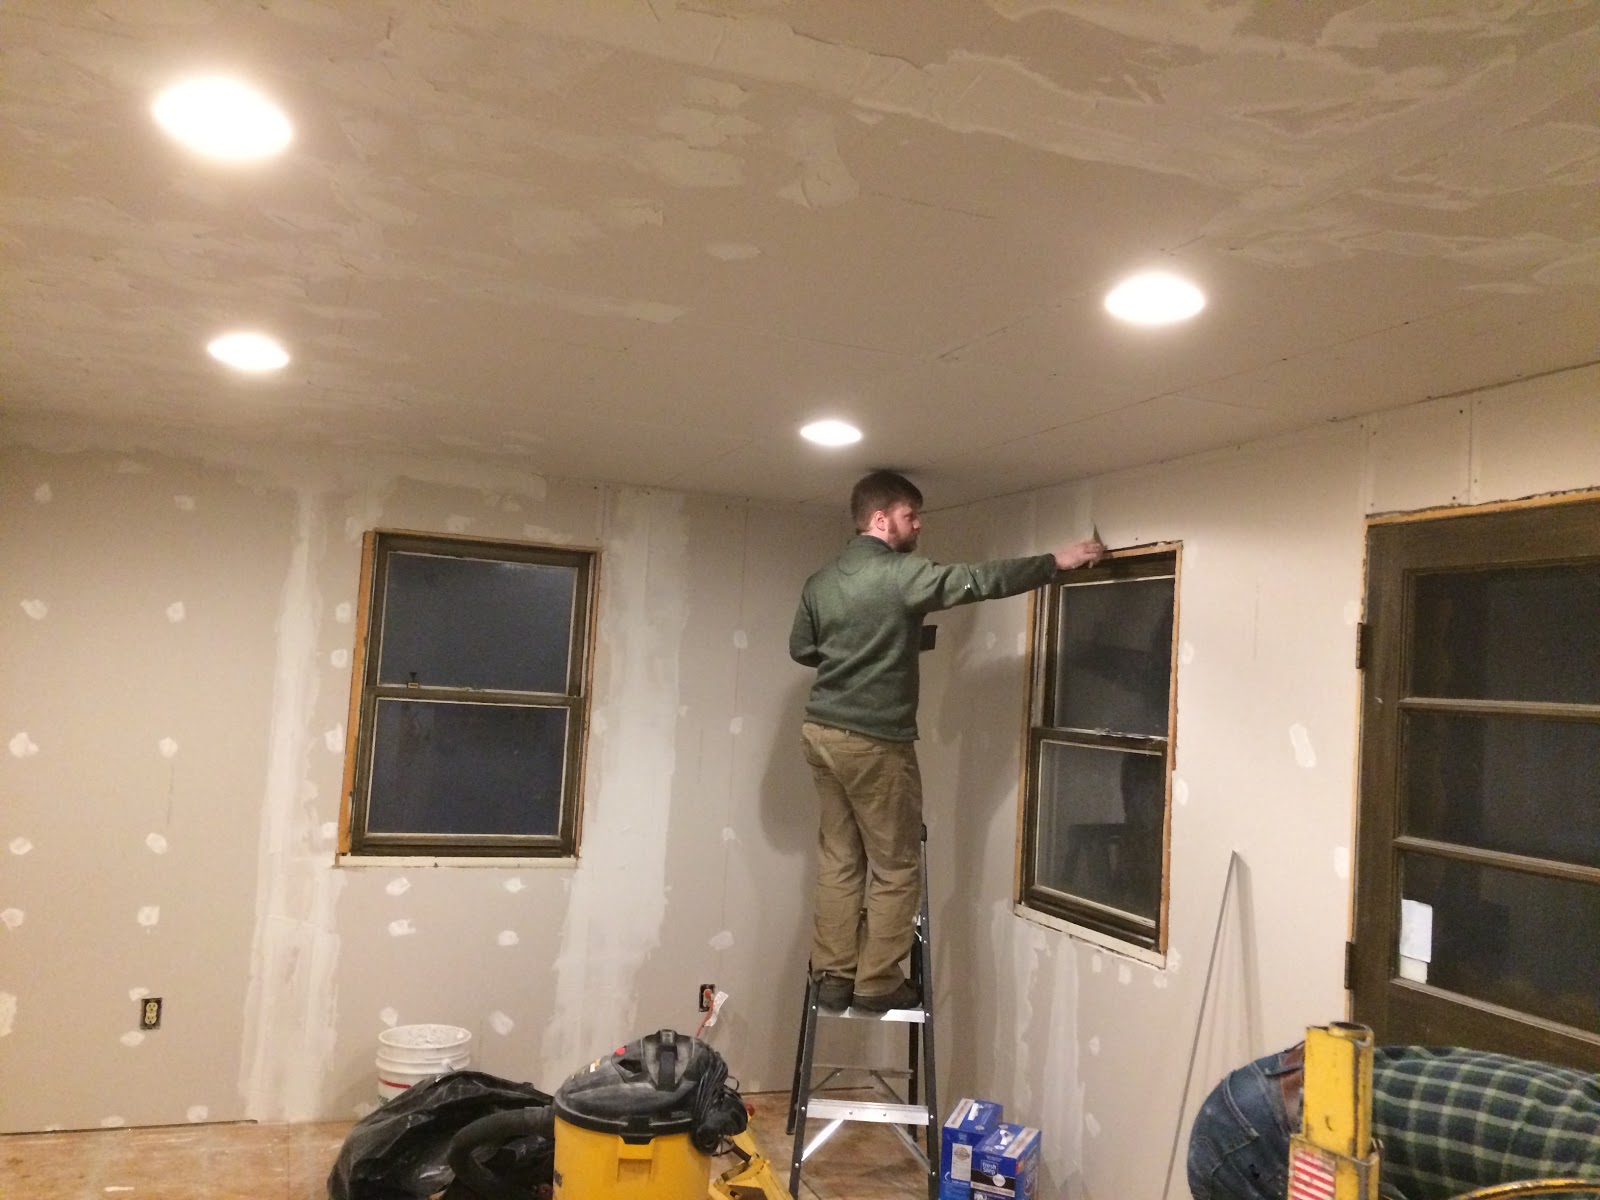
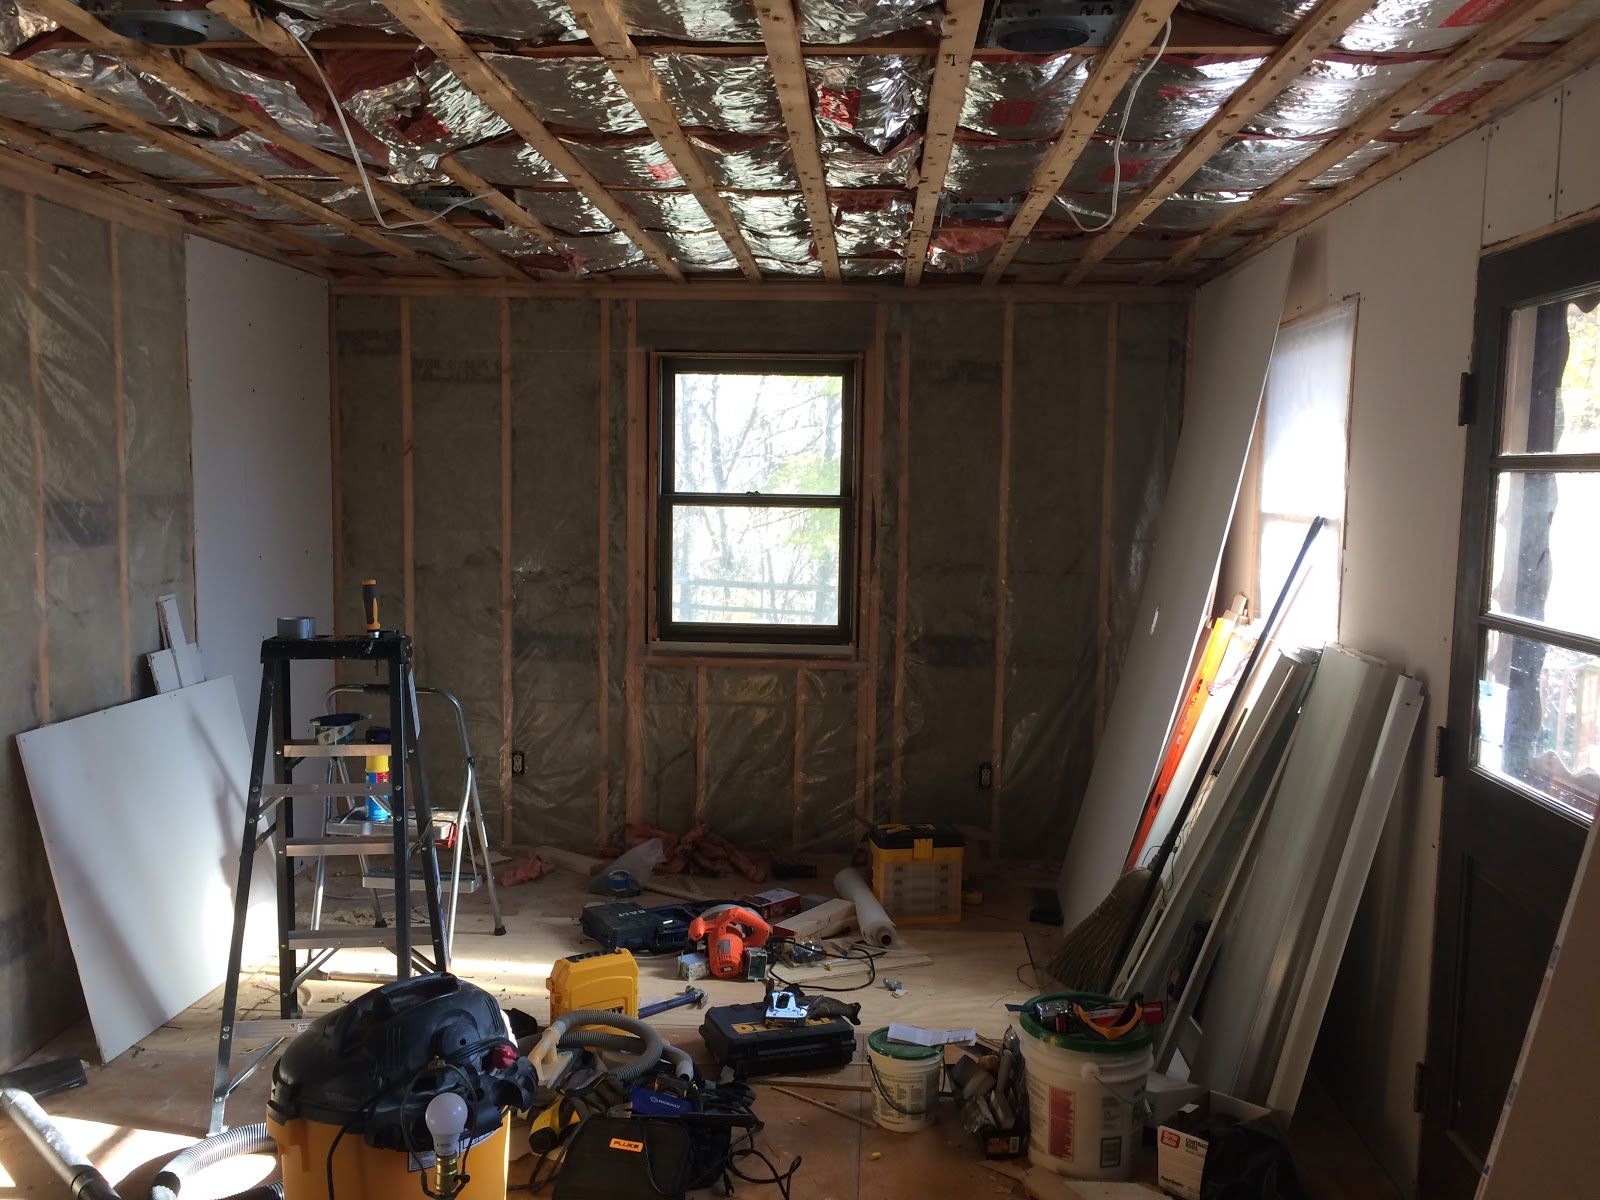
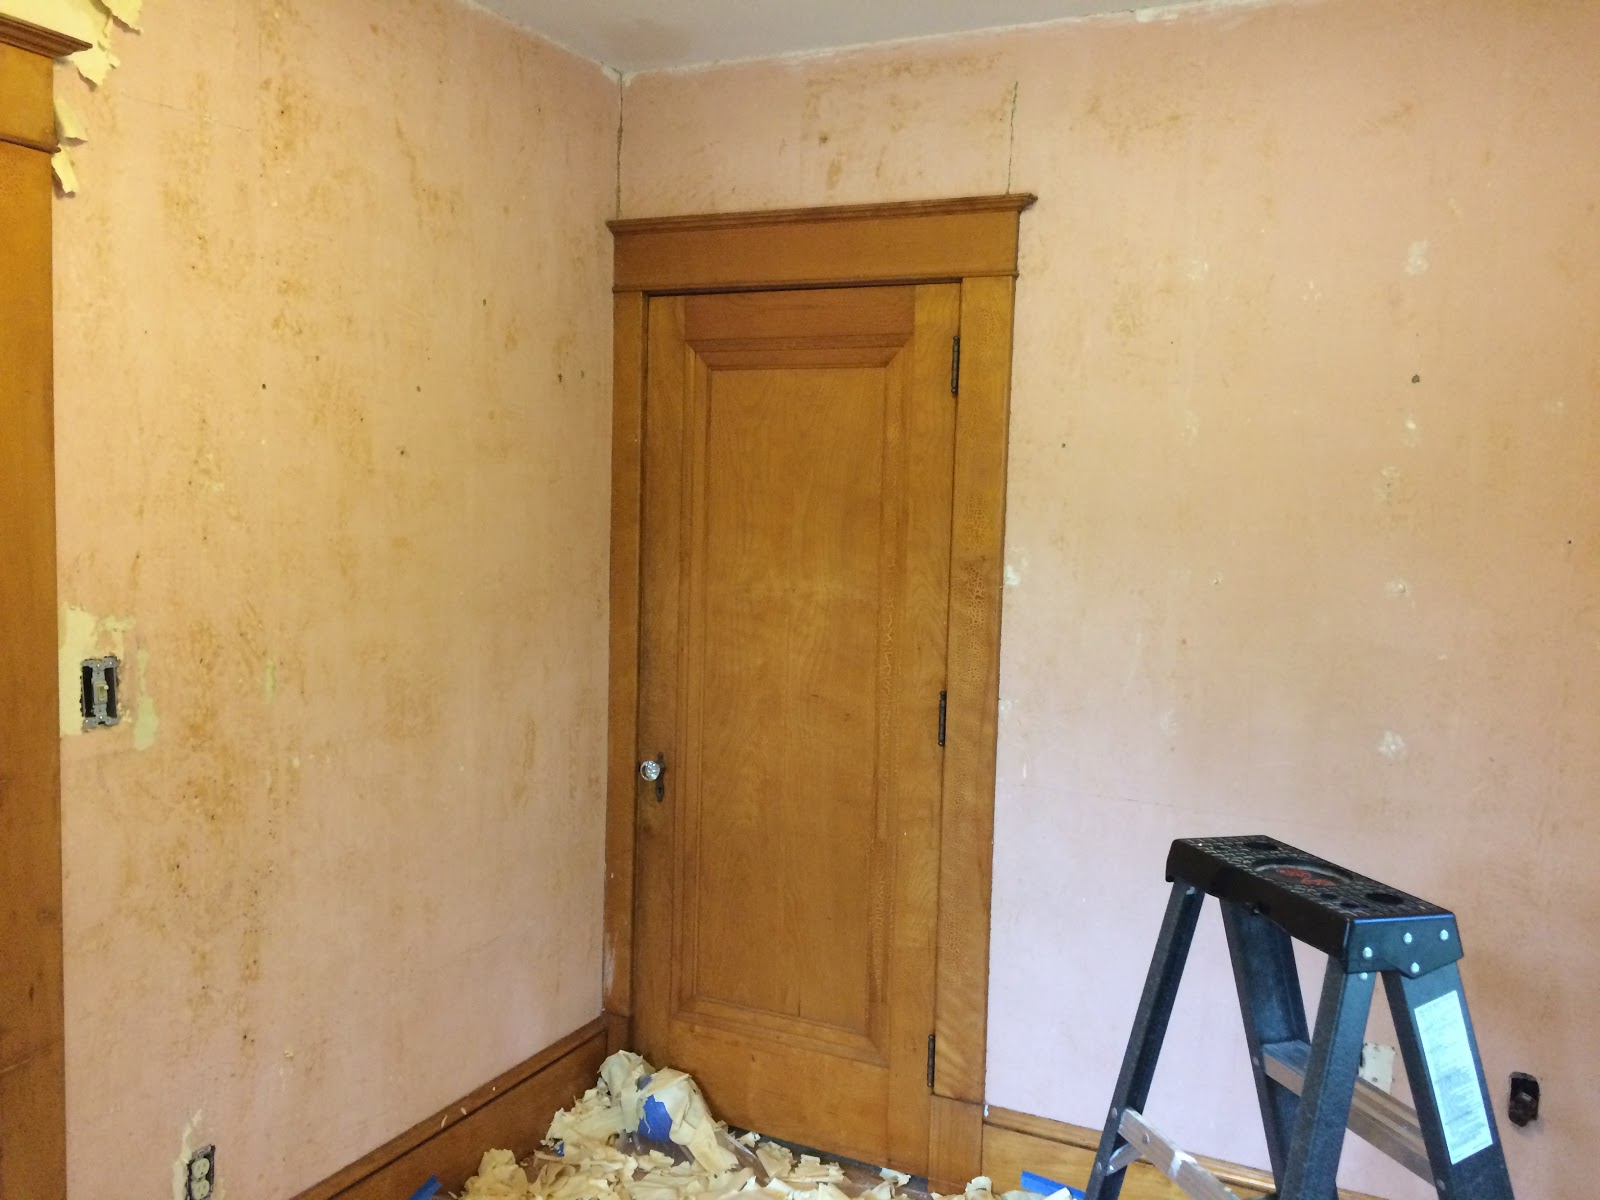
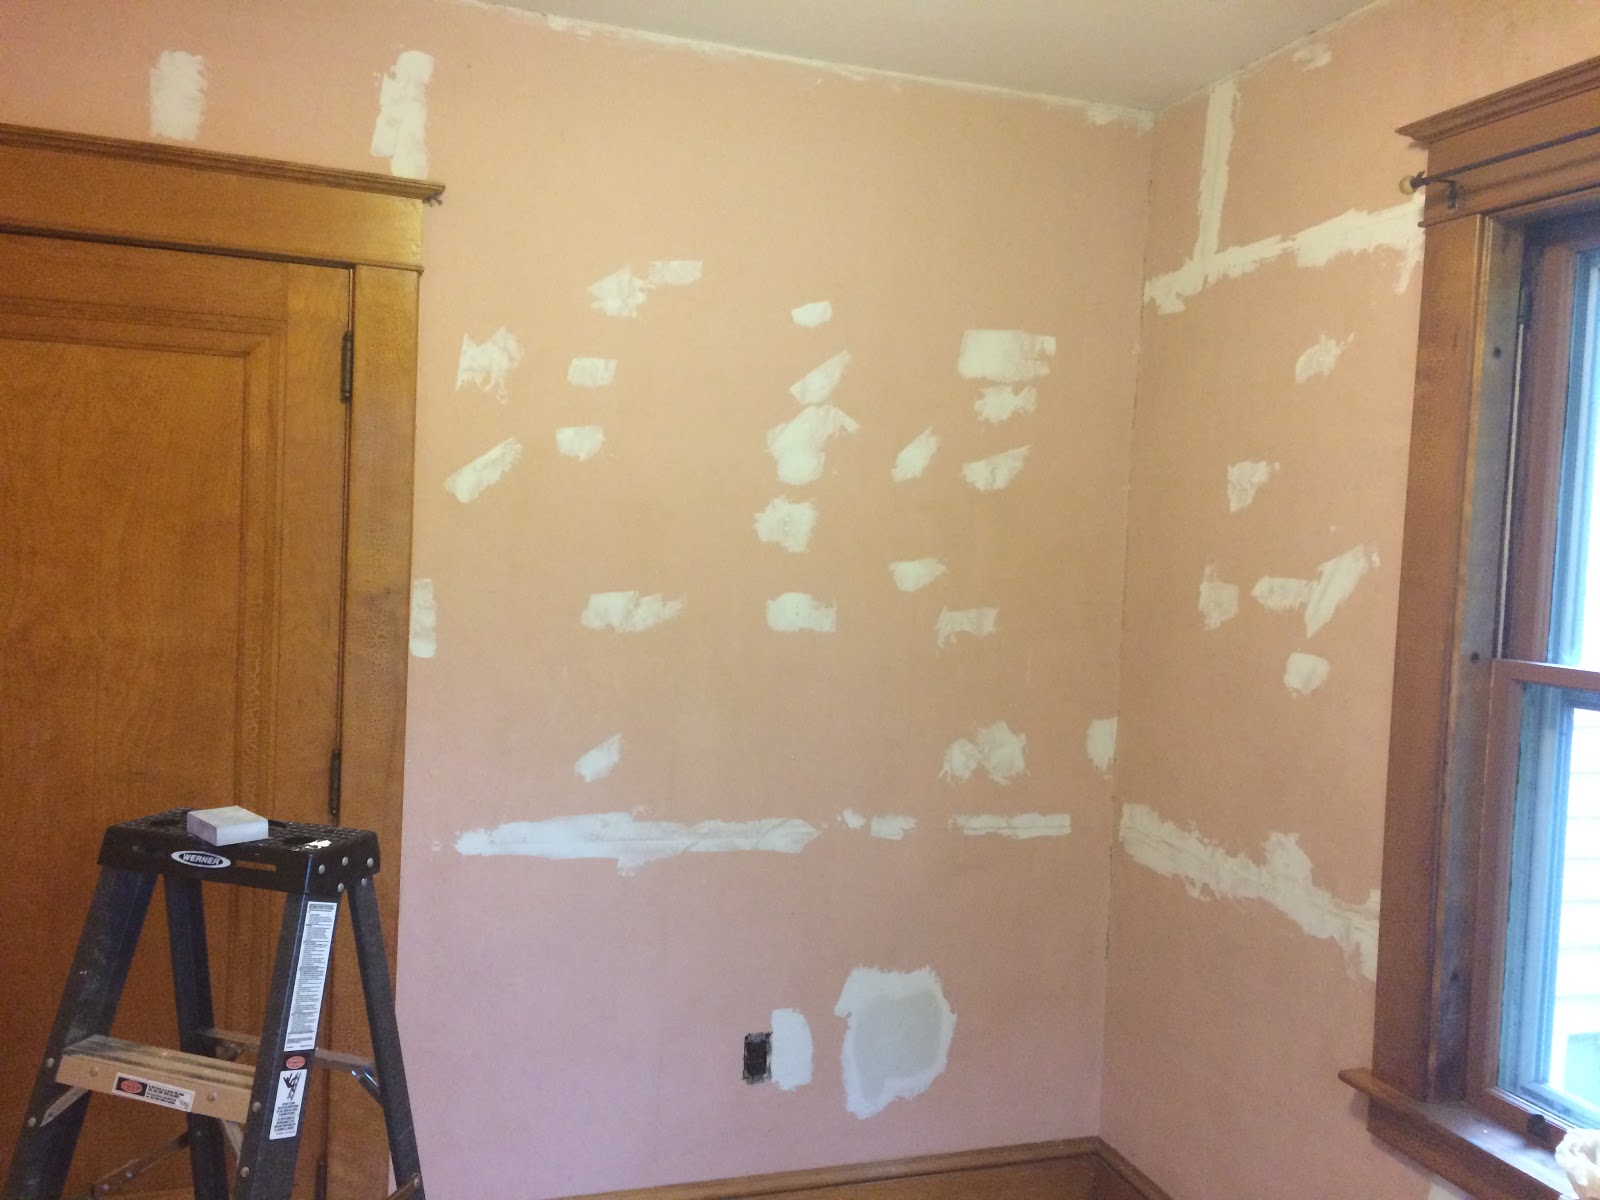
That’s pretty much the same view, just zoomed out a little more, and centered instead of aimed left.

We have:
– torn out the old paneling and the sheetrock underneath and the crappy fiberglass insulation underneath that
– torn out the old ceiling
– cut out all the old shelving and the weird bar thing
– pulled up the old carpet
– picked up the old tile (yes, it’s asbestos; they are all intact, not crumbling, and were no longer glued to the floor. I picked them up carefully with gloves and a respirator, double-bagged them, and consulted with the local waste management district on a hazardous waste disposal plan)
– pulled out the old fluorescent lighting
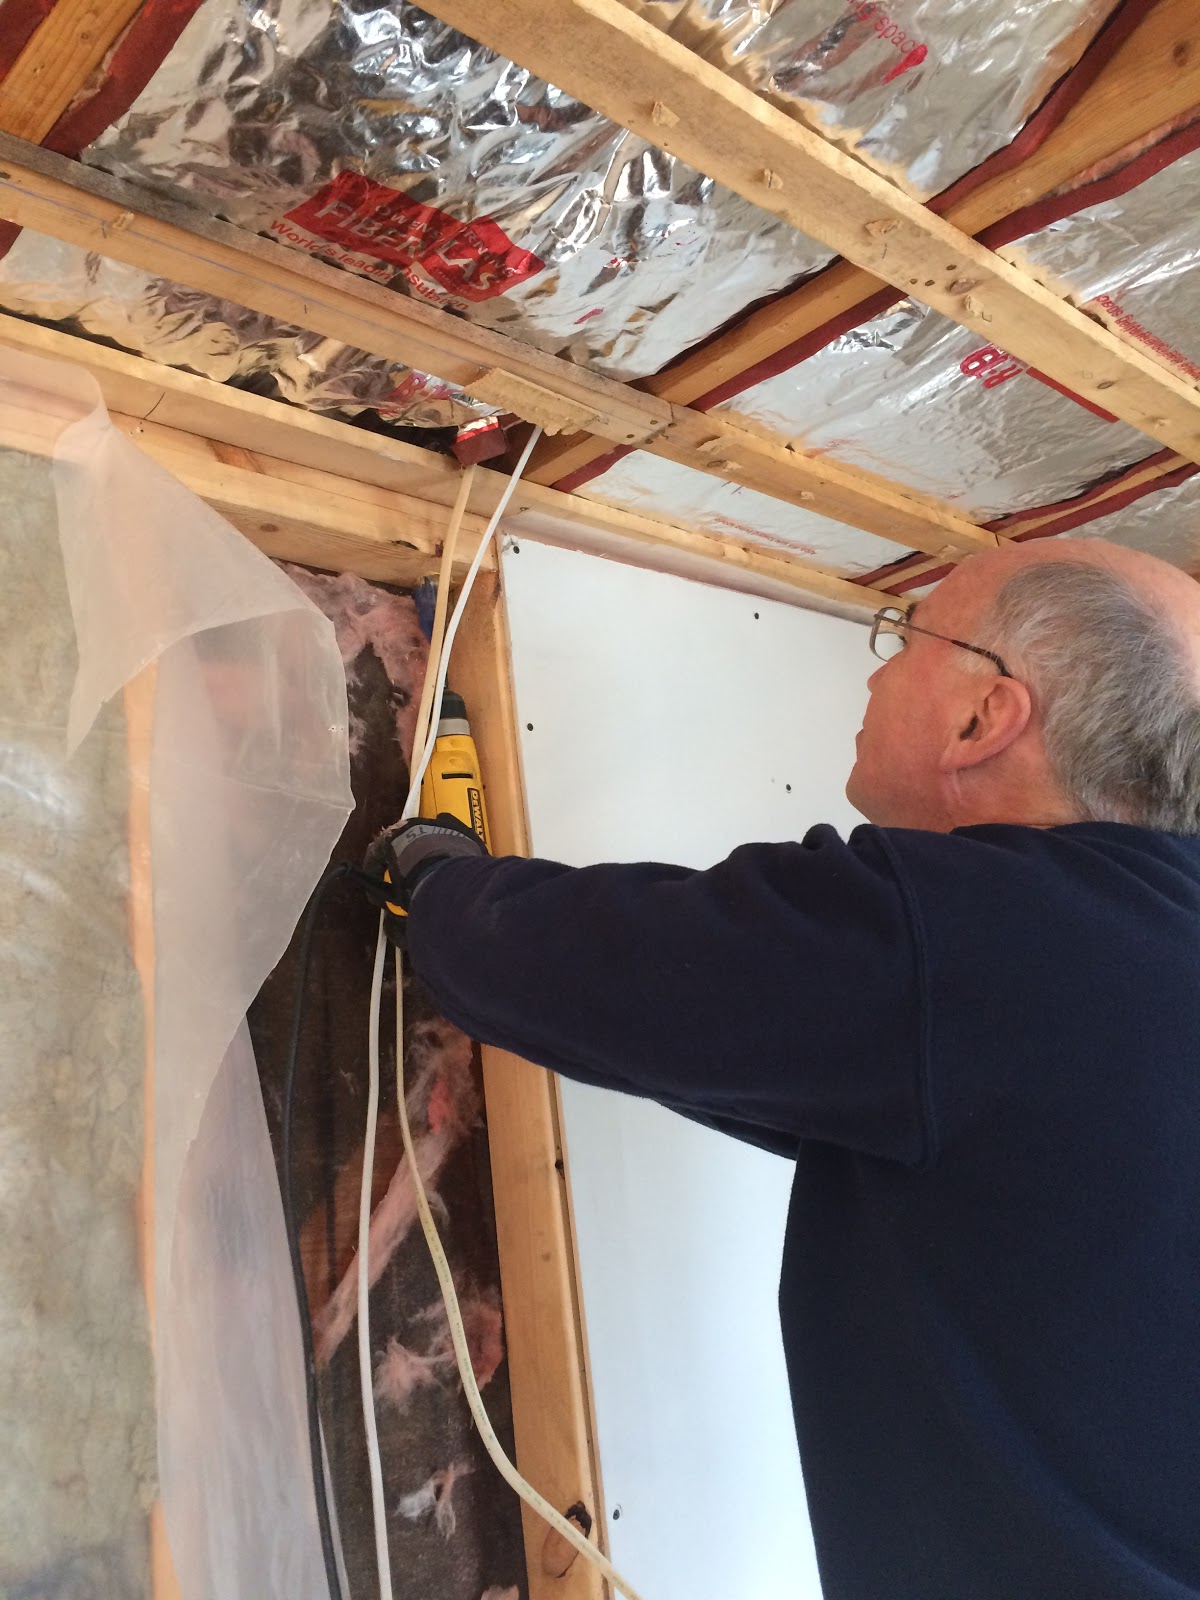
– replaced the old insulation with Roxul for a higher R-value, added an extra layer of insulation to the ceiling
– put up a vapor barrier (nonexistent before)
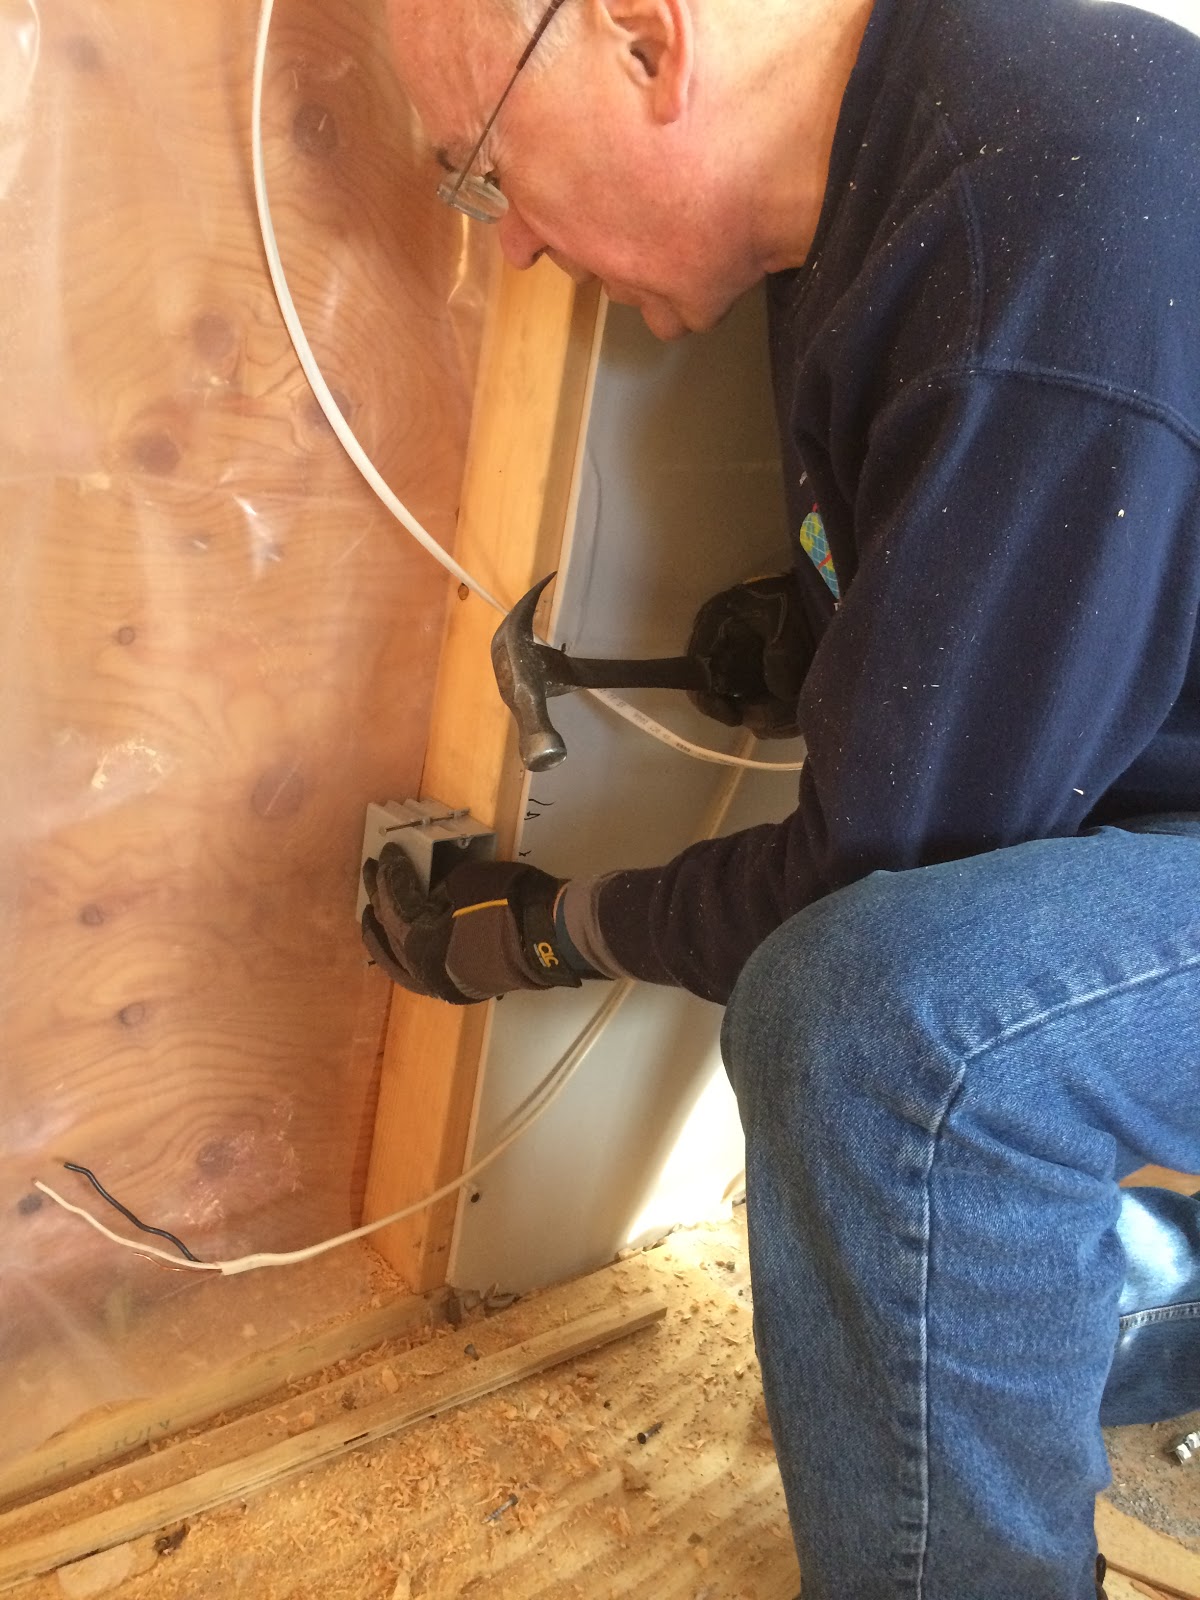
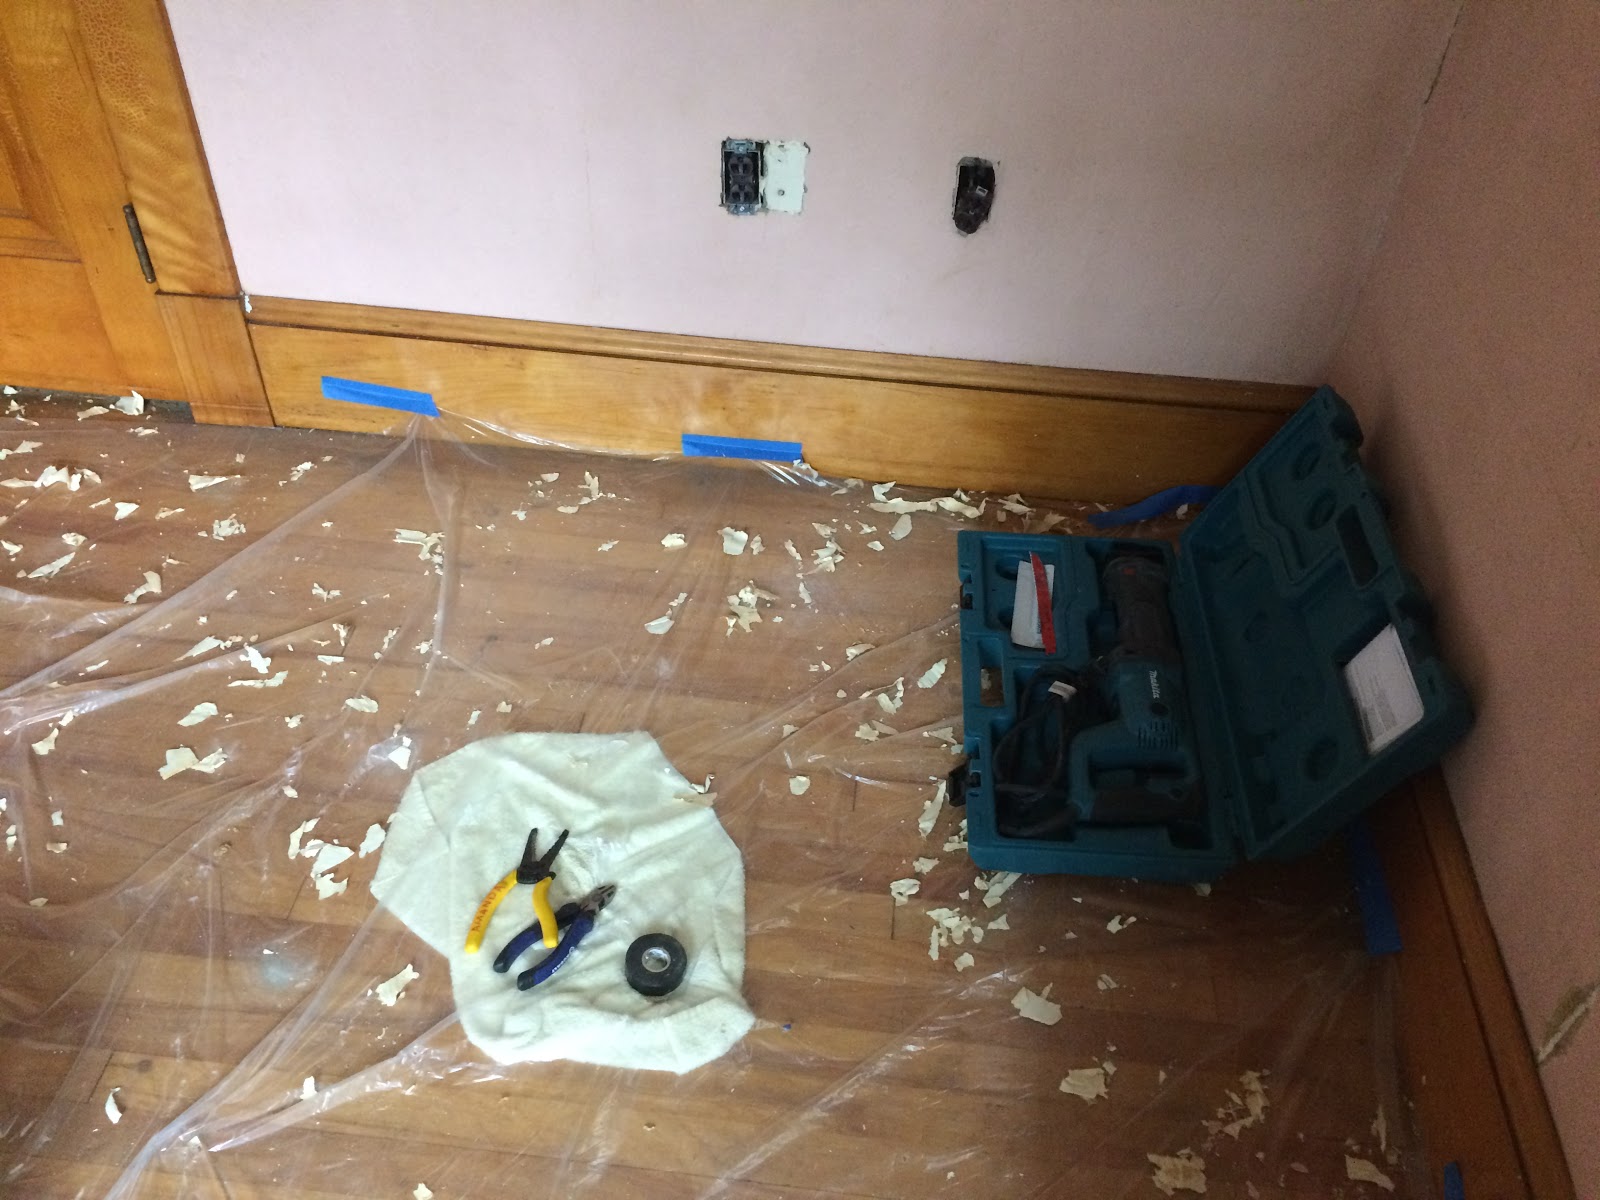
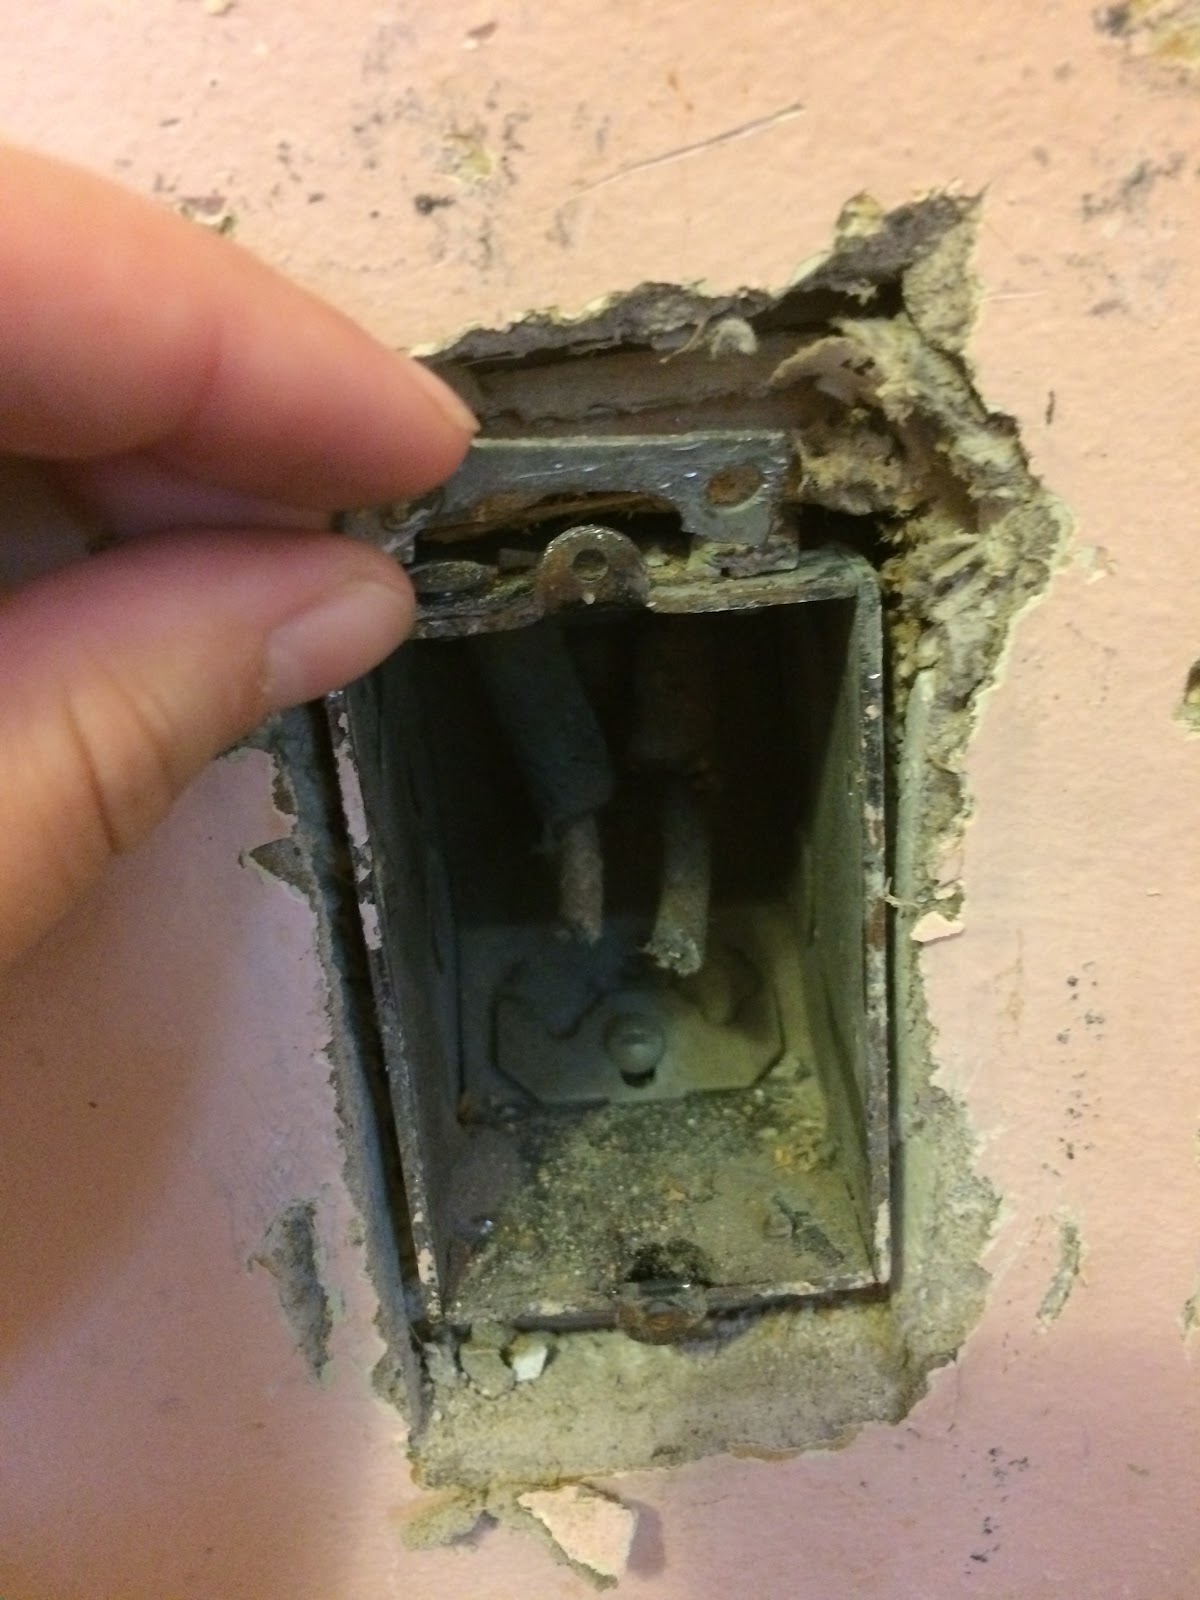
– dropped (most of) the outlets from the middle of the wall to the floor (you can see them if you squint)
– added recessed lighting to the ceiling
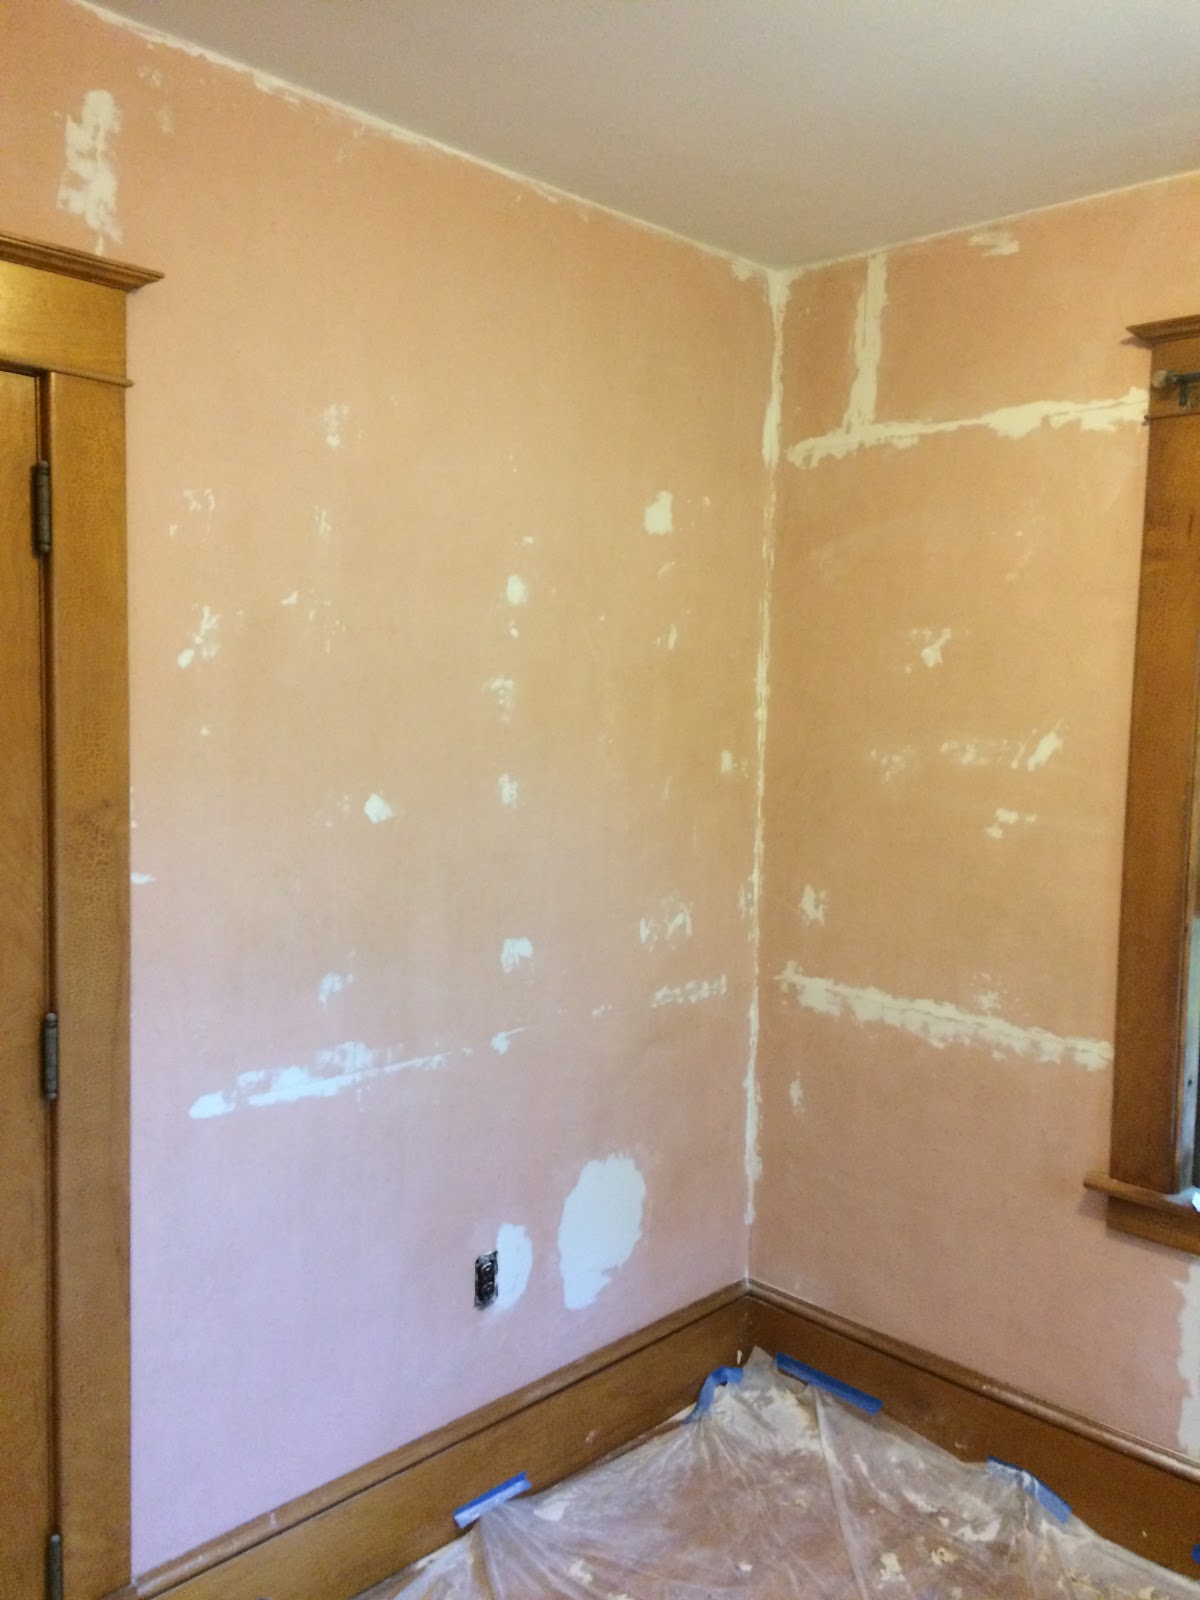
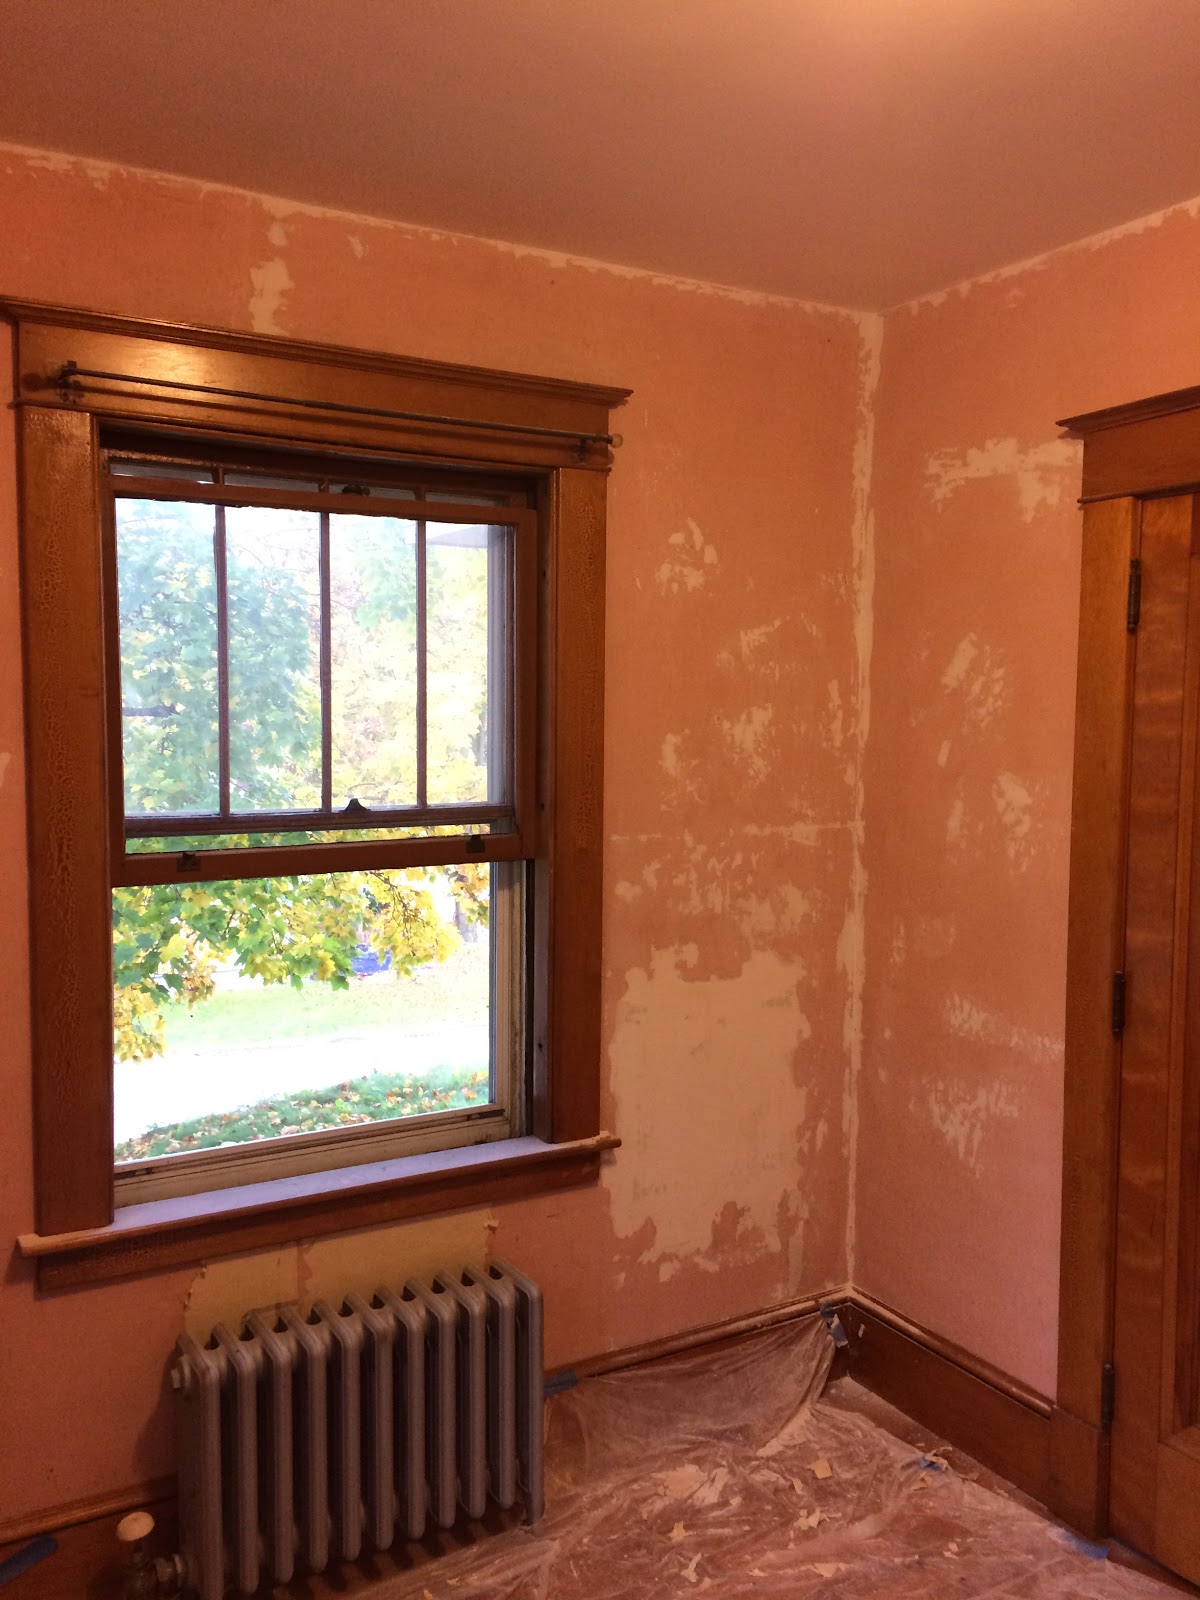
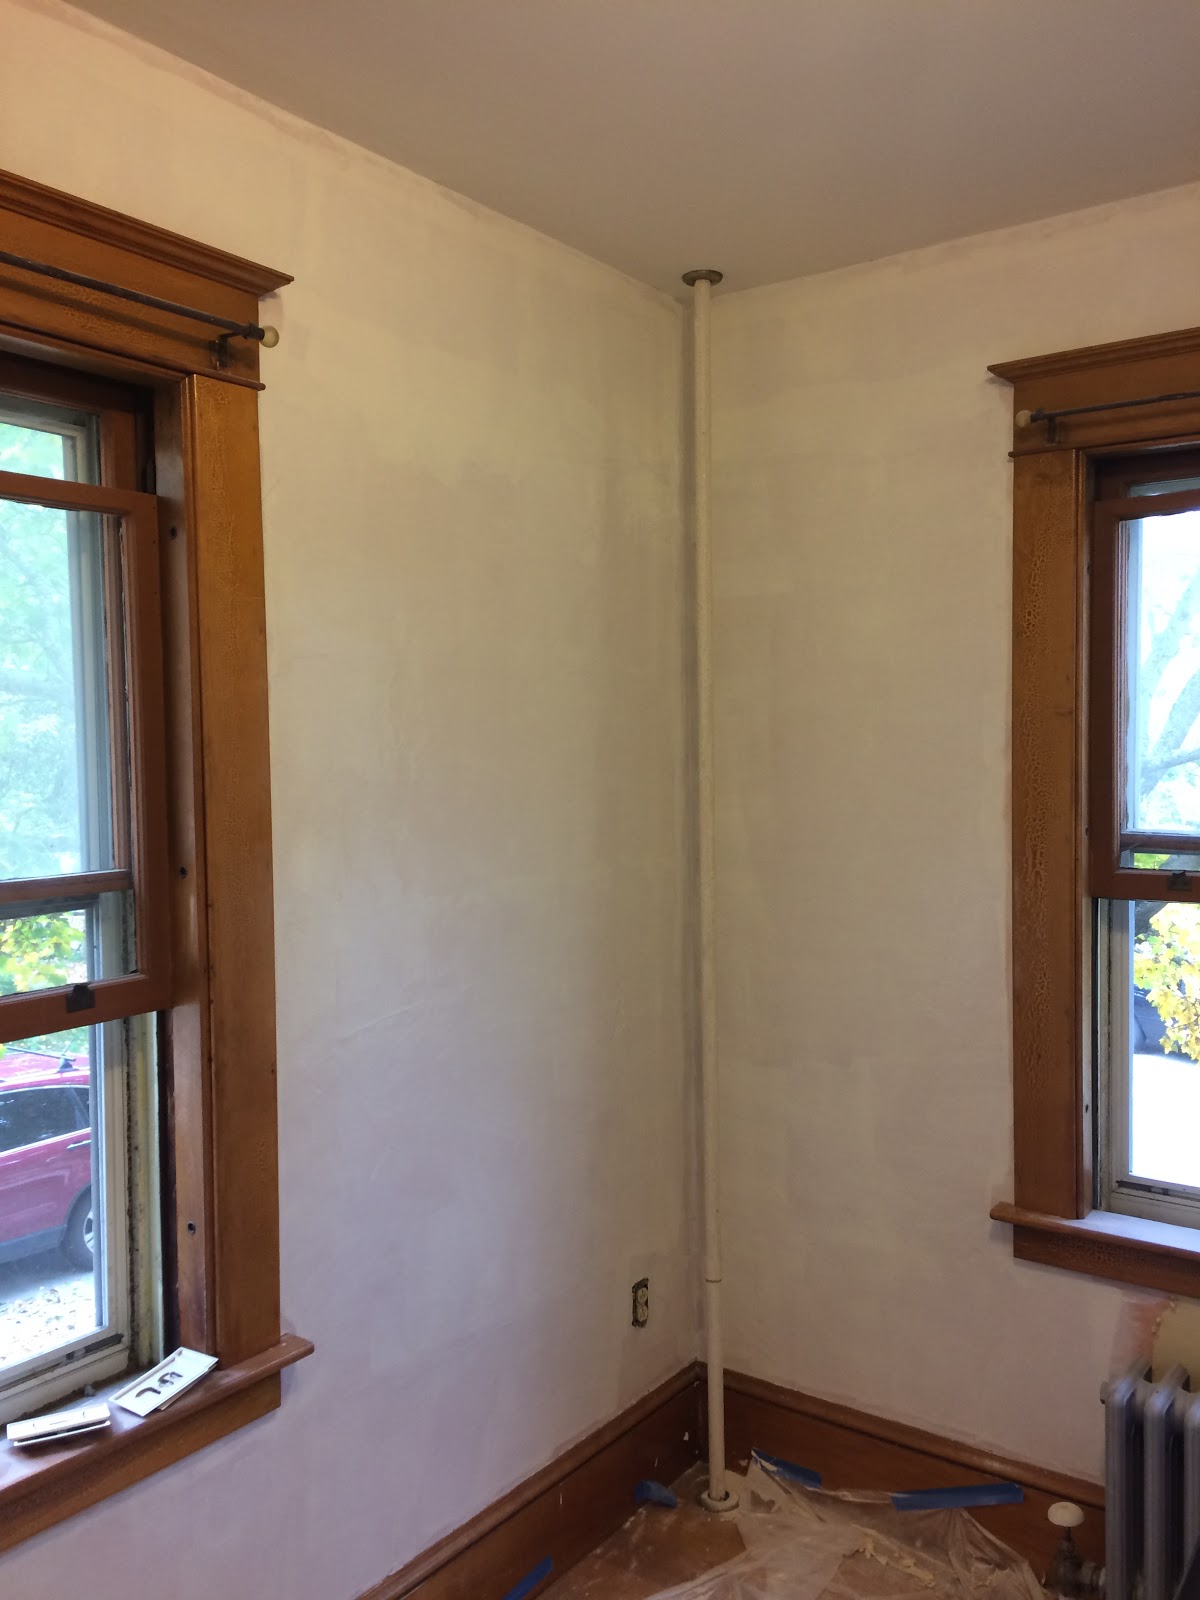
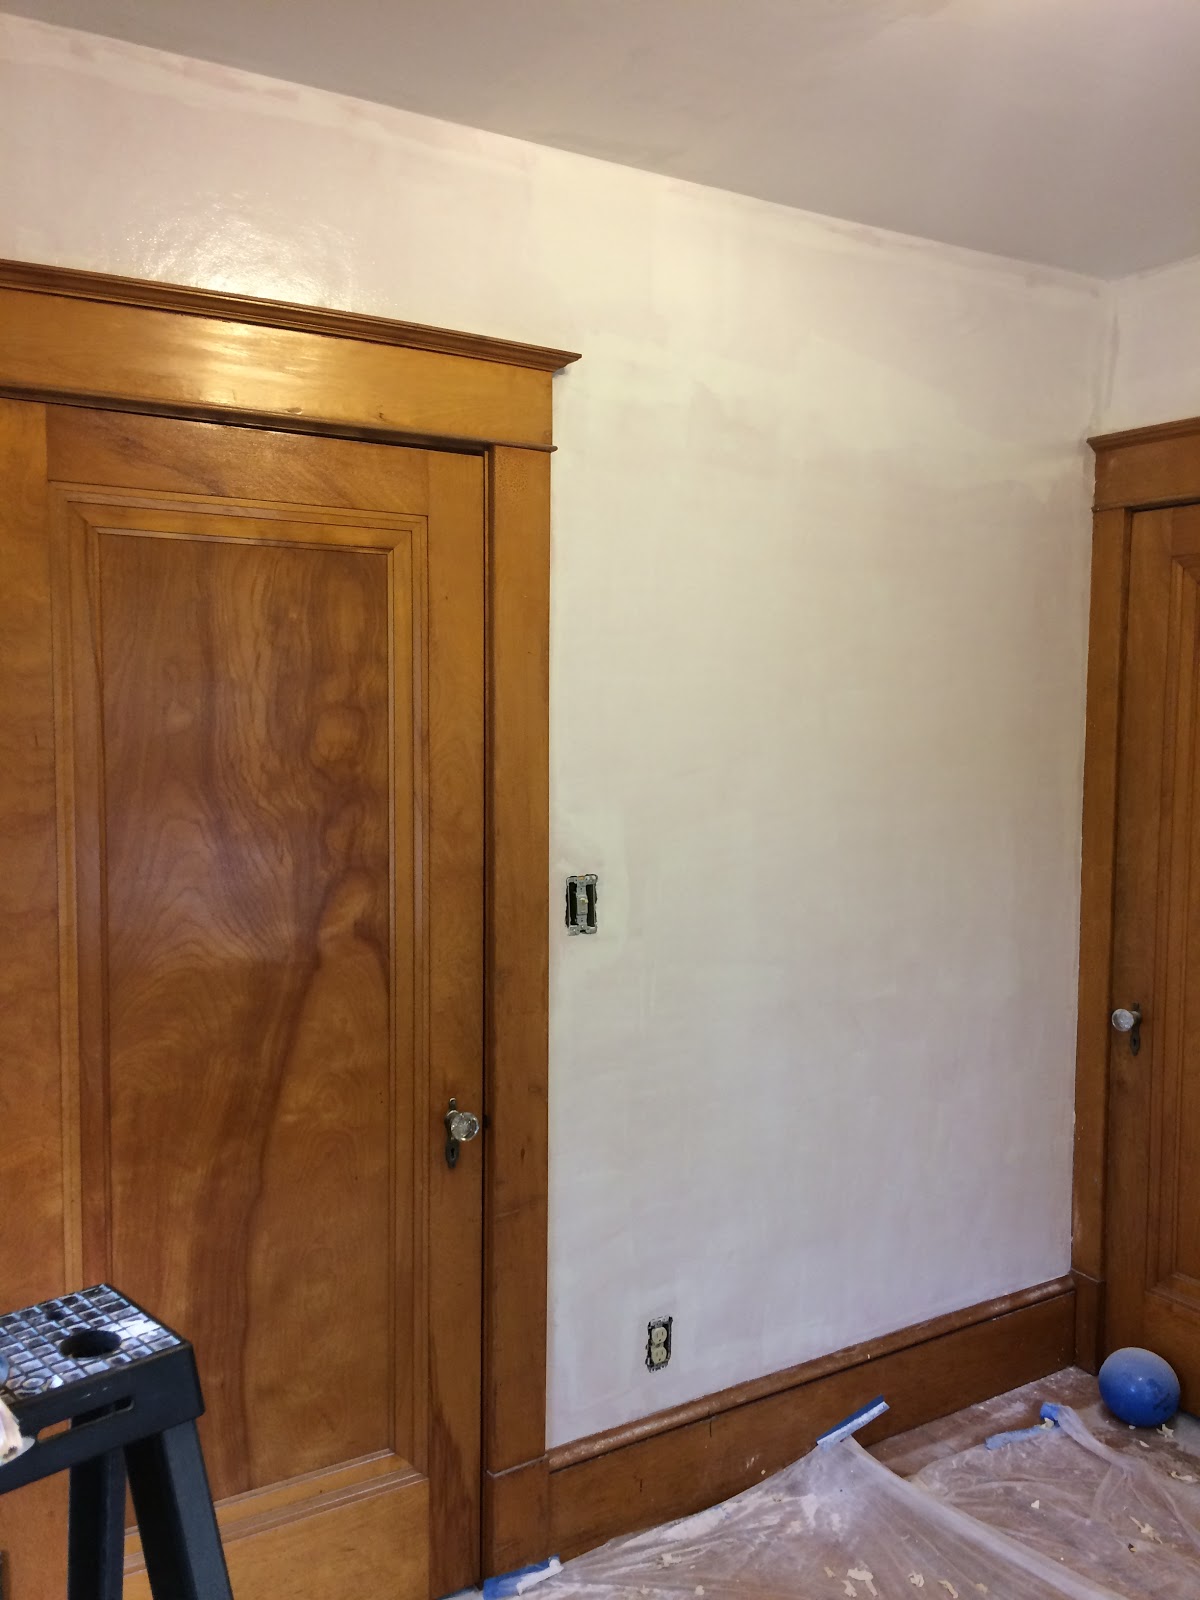
– replaced the old sheetrock with new

Still to do:
– finish sealing off the window & door frames with foam
– remove the staples from the ceiling strapping, put up vapor barrier, put up sheetrock
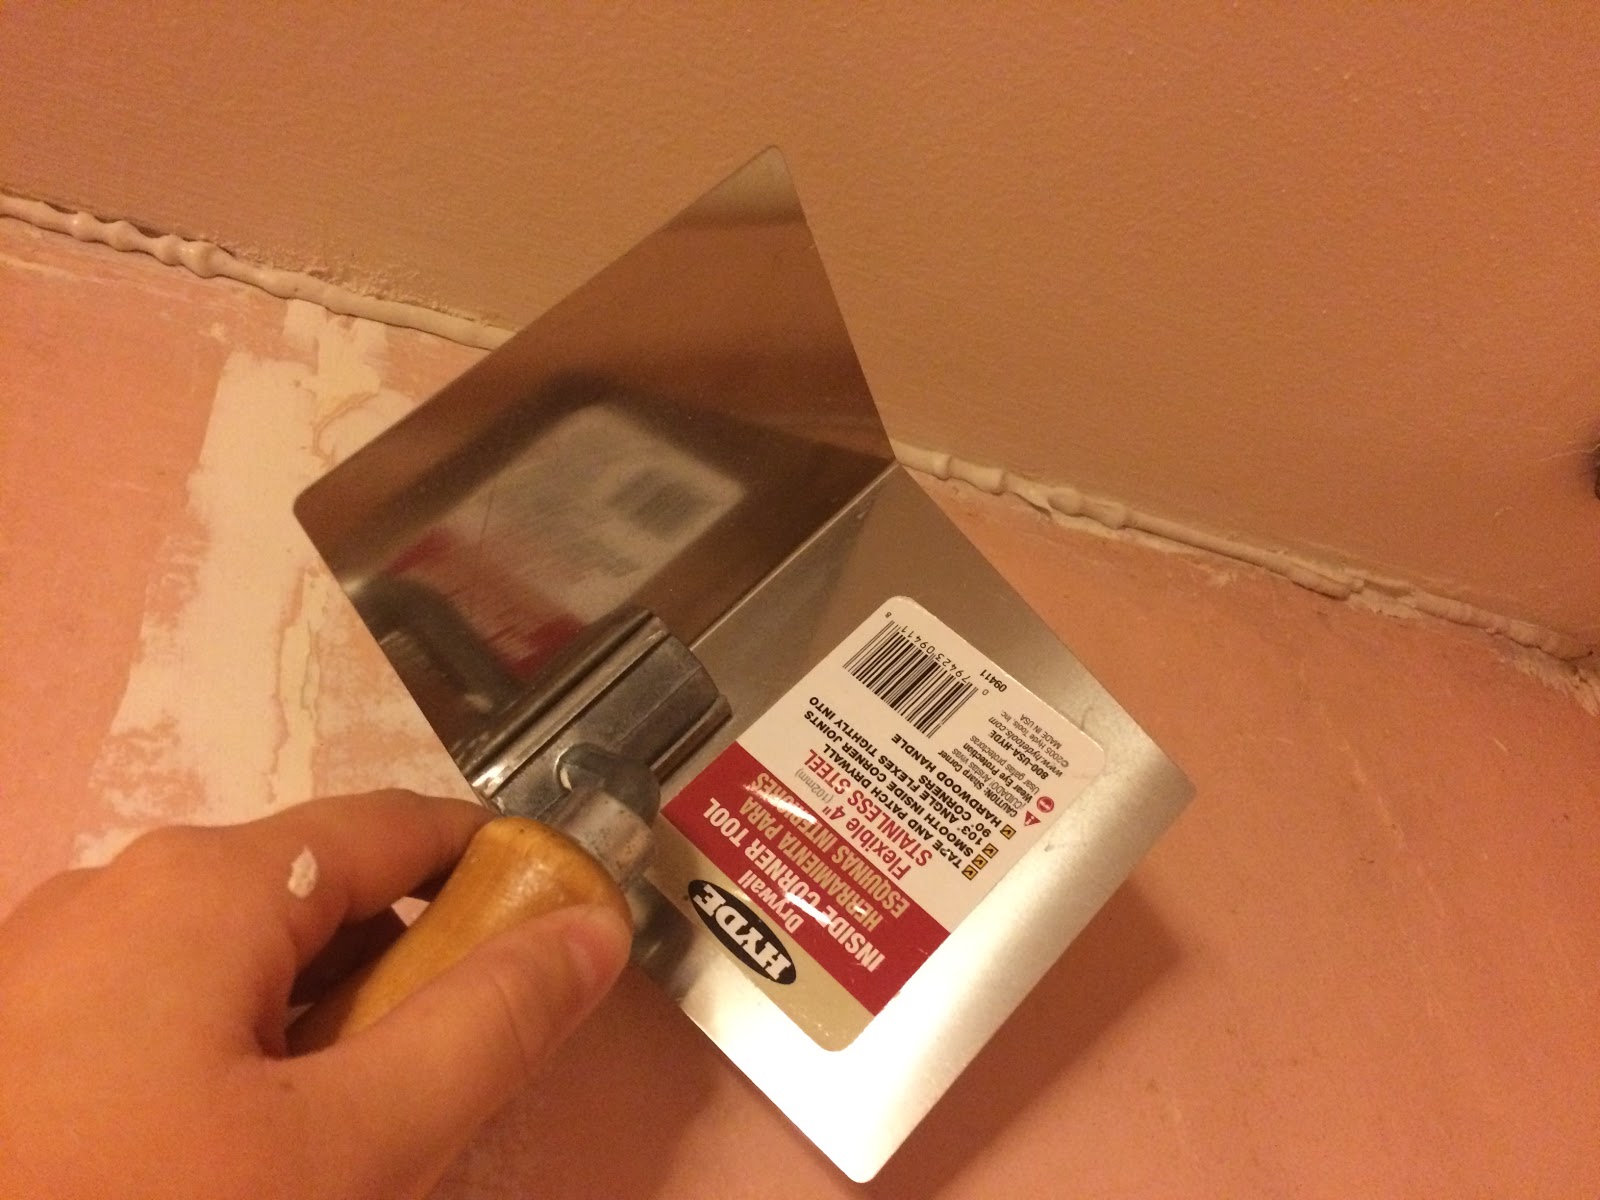
– mud and paint everything
– replace the flooring; currently deciding between carpet and tile w/ area rugs
– reframe windows & door
– decide on a heat source: space heater? baseboard electric? extend the radiator system?
– furnishing; we will need a pull out loveseat and a dry bar

LONG term still to do:
– insulate the floor; this is part of the godawful crawlspace project that I am trying to pretend doesn’t need to be done but really will have to be on the schedule for next summer, ugh.

Total time elapsed so far: about 4 weeks; maybe about 7 solid days of work within those weeks.

I have lots of process pictures so in weeks to come I’ll go into more details about the pieces of this project. I hope (?) that by January we will have a finished space.

house post

House Post: What to do about this steam pipe?

Not a terribly exciting question, but one of interest to me.

See, the longterm plan is to get all of the radiators in the house sandblasted and repainted. We’ve done two so far. This summer was a bust in terms of getting them done; the house will be much further along for next summer, and that will be one of my main focuses. (We can’t do them during the winter because then not only do we not have heat in a room for a few weeks, it’s a PITA to cap off the steam pipe.)

Steam radiators work by having a furnace in the basement that superheats water, turns it into steam, and then sends that steam through pipes to the radiators. The hot steam works its way slowly through the coils of the radiators, heating them up, expelling extra air from the regulator at the end, and then condensing back to water at the bottom of the radiator and draining back down to the furnace, where the whole thing starts all over again.

We are really happy with the steam heat system, overall. It works amazingly well, heating up the house quickly and thoroughly, and after a little bit of adjustment I even find the sounds of the system working to be pleasant and reassuring.

In order for the steam to travel up to the second floor, many of the rooms on the first floor have steam pipes in the corner. They’re also an additional source of heat. All of those pipes are currently painted to match the walls behind them – mostly cream or beige, matching the radiators themselves.

What to do about the steam pipe in my office, the first downstairs room we’ve renovated with a steam pipe?

Taking it out would be a HUGE hassle, so whatever I do has to be in place.
Right now, my best thought is that I could sand the paint off and repaint it to match the radiator, a chrome color. But I worry that that will be too distracting. There’s also the fact that the paint might well contain lead – so I’ll have to be VERY careful about the dust.
I can leave it as is – the paint is in more or less fine shape and the cream does work with the blue behind it. It’s halfway behind a chair anyway, and the way you enter the room means your eye is not drawn to it.
What would you do?
equine art · house post

Decorating the Office – Equestrian Style

Now that my office is FINALLY finished (in fact, I am writing this blog post on my own computer at my own desk like an actual grown up!), I need to think about what and how to decorate the walls.

Most of my horse-themed art will go up on the walls. I’ve previously reviewed the various pieces I own here.  I’ll also be putting up my Kendall’s Spavin Cure poster and getting a high quality print of the amazing cartoon of Tristan that Emilie drew for me.

So far, I know I’ll be adding these World War I cavalry propaganda posters to the walls. I’ll download the high-resolution TIFFs from the Library of Congress and bring them to my local print shop. At 11×17 sizing, even on good paper they’ll only cost a few dollars each.

I also have a chair in the office that, longterm, needs to be reupholstered. When I do finally get around to that, I’d like to add a throw pillow that fits with the theme. Maybe some horsey fabric on spoonflower.com.

Obviously, my ribbons will be hung up in the room. I don’t have so many of them that I can or should think about other ways to display them besides hanging. Someday, maybe – but for now they’ll go on the curtain rods.

How do you decorate in an equestrian theme?

house post

House Post: Office Renovation

I so wanted this to be a finished project post…but you’re getting progress photos instead.

So!

Let’s talk about my office.

Here’s the photo from the real estate listing.

Here’s a close-up of the wallpaper.

Oh, yes.

Somehow, I don’t have a close-up of the border, but: pink and green butterflies. Yup.

Needless to say, down went the wallpaper.

Then, scrubbing off the wallpaper glue which was a PAIN IN THE ASS. Eventually the system was to use a spray bottle of super hot water + vinegar + a little bit of Dawn dish soap.

Above, you can see the scrubbed walls on the left and the gluey walls on the right. Hard scrubbing. Every goddamn inch.

Then: plastering. So much plastering. Endless plastering. Days and days and days of discovering new things to plaster.

Also, discovering that some fuckwit had used SCOTCH TAPE to cover up the previous holes.

Things to plaster ranged from wall cracks from settlement…

… to these holes from the electrical work.

YEAH. THAT MUCH PLASTER.
Then I washed the walls again, because that plaster dust, it was everywhere. That only took 45 minutes or so of piping hot water with a decent sponge.
Then: priming! I did this all in one fell swoop…and it’s kind of where I’m stuck now. I’ve been agonizing over paint color. I have a color that I love, but I’m terrified it’s too dark for the room. I’ve decide to go ahead with it, because paint is the simplest thing to change about all the work I’ve done. And I do love the color: Sherwin Williams Needlepoint Navy.

Finally: quick paint test preview.
Possibly even by the time you read this post (which I’m writing on Saturday) I’ll have finished painting, and next week you can look forward to everything final!
house post

House Post: Moar Plaster; or, Horse Girls Get Shit Done

My office renovation continues to crawl along.

I swear there is not a single square foot of this damn room that does not need plaster.

Including every corner. Every single one. Everywhere a wall meets a wall. Everywhere a wall meets a ceiling. Gaps. Crumbling plaster. Awfulness.

I’ve done corners in other rooms. I hate it. It’s a pain in the ass wedging the plaster in there using the spatula. So I was casting around for a different idea.

And I had a brilliant one.

Let me count the ways in which having a horse has made me more competent and creative. So many ways. This is definitely one of them.

I stopped by Tractor Supply and picked up a 60cc syringe with catheter tip. I filled it with plaster.

BOOM.

Instead of hours carefully wedging plaster into those gaps, with the attendant endless sanding that would’ve been required, I squirted in a line of plaster and then followed up with my corner trowel.

Now, there is still endless sanding, but way WAY less. And instead of getting frustrated and quitting halfway through like the toddler I often mentally am, I did every corner. Every one.

I’m now halfway through sanding them, and it’s not even that bad, as sanding goes.

Hopefully soon – maybe next week – I’ll have some overall project photos to share that include paint color!

house post

House Post: Outlet Removal

REALLY big things happening as I type this blog post, things with actual demolition and dramatic improvements, but instead I shall share a small piece of what has become my current bete noire project: my office.

Taking down the wallpaper was easy. Scrubbing off the wallpaper glue was harder, and more time consuming. Patching the walls has been a godawful neverending nightmare. A project that I slated to take 2 weeks is into week 3 with no chance of getting to paint anytime soon.

I’ll do a more complete recap later but here’s a small 30 minute portion of it.

At some point, someone added extra outlets to this room. Probably when it became the office for the previous owners. (It’s labeled “Dad’s Office” on our breaker box.) (They also added TWO cable cords, ahaha, pre-wireless days.) So there were two outlets on new wiring, and two on old.

One of the old outlets was 6″ from a new outlet, so there was zero point in rewiring it because power strips exist. We left it. And last week, I finally got around to cutting it out entirely.

Tools: pliers, wire cutters, electrical tape, saws-all
Please note that I was absolutely 100% certain there was no electricity going to this outlet. You should also be before trying something like this at home.
Step 1: unscrew and yank out the outlet itself.

Step 2: cut the wires, and tape off the ends with the electrical tape, mostly for completion’s sake.

Step 3: saws-all time! If you’re like me, and really really effing bad at handling the things (which tend to jump all over everywhere unless you brace them) this it the WORST.

Yeah, I just sawed right through the metal pieces holding it to the wooden backing because I could not be arsed to unscrew them. Which was not a great idea, I admit, though that’s what saws-alls are meant to do, because it exacerbated my difficulty in holding the damn thing still. But either way: gone!

Step 4: lament your shitty saws-all skills.

Step 5: lament some more.

Step 6: begin the patching process! (I’ve laid this out previously here. Same principle, different location.)