
Okay, last time we left the bathroom waterproofed but nothing else.
That means: tile time!

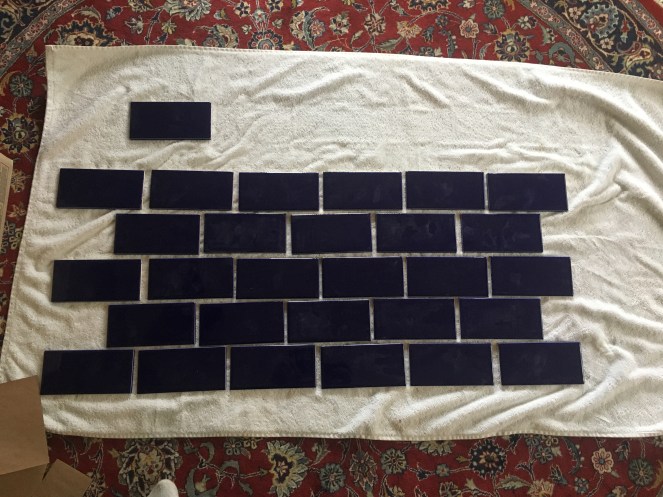
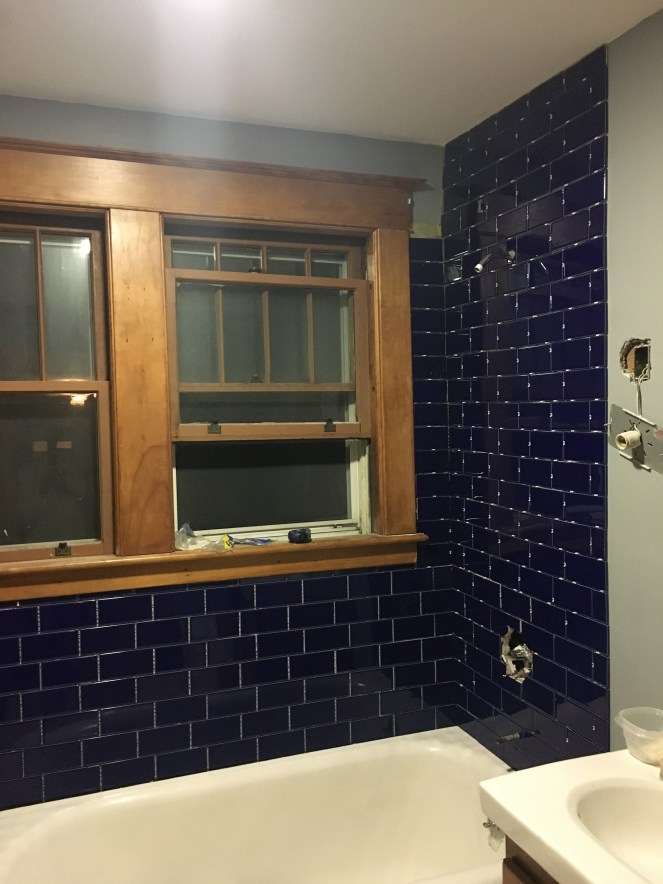
Everything I read said to plan a lot before tiling, so I laid out the tile in a bunch of different ways. I didn’t like straight brick pattern or 1/2 offset, and after much googling landed on 1/3 offset, which is what you see here. These are 6″ subway tiles, so that meant my measurements would be in 2″ increments, which means I did a TON of measurements to get a rough sense of how many tiles per row, and where to start so that the corners would hit roughly full or 2/3 sized tiles. Like 5 hours of measuring and planning and double-checking. I had taken the day off work and burned up most of my daylight with the planning.
But then I started, sort of center-ish, above the end of the tub.
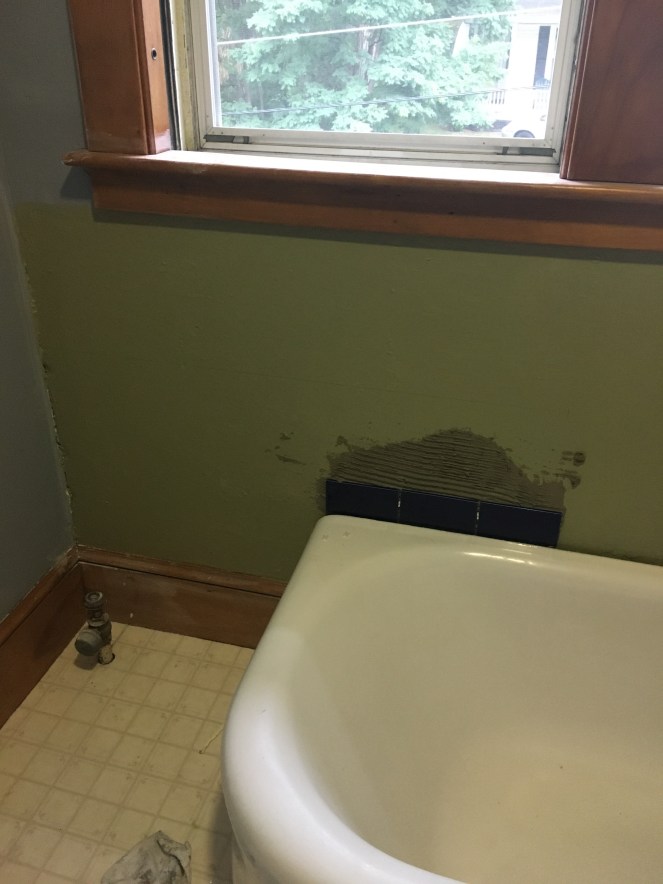
These first few were VERY hard because I wanted to make infinitely sure they were level since I’d be basing so much of my other tiling on them.
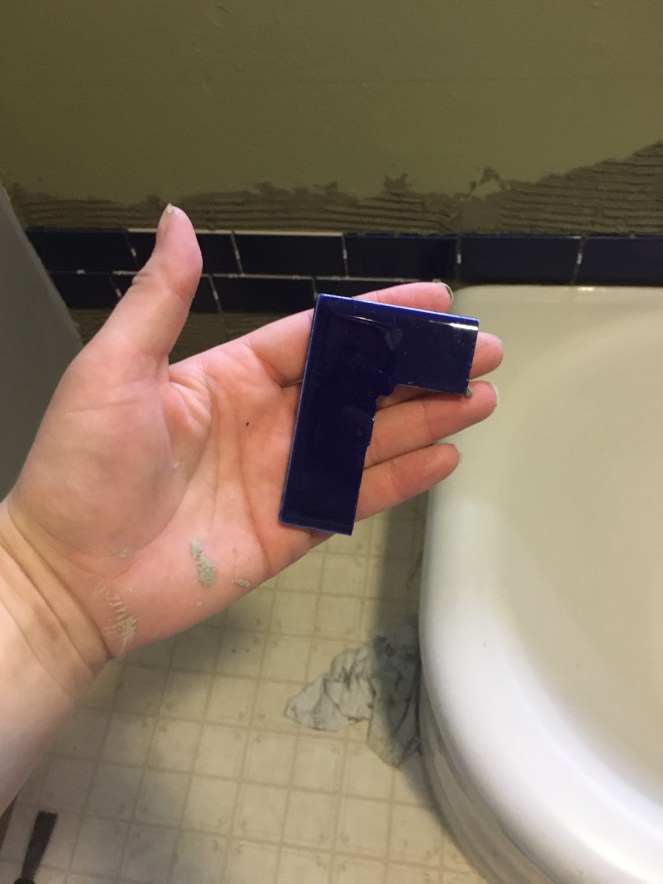
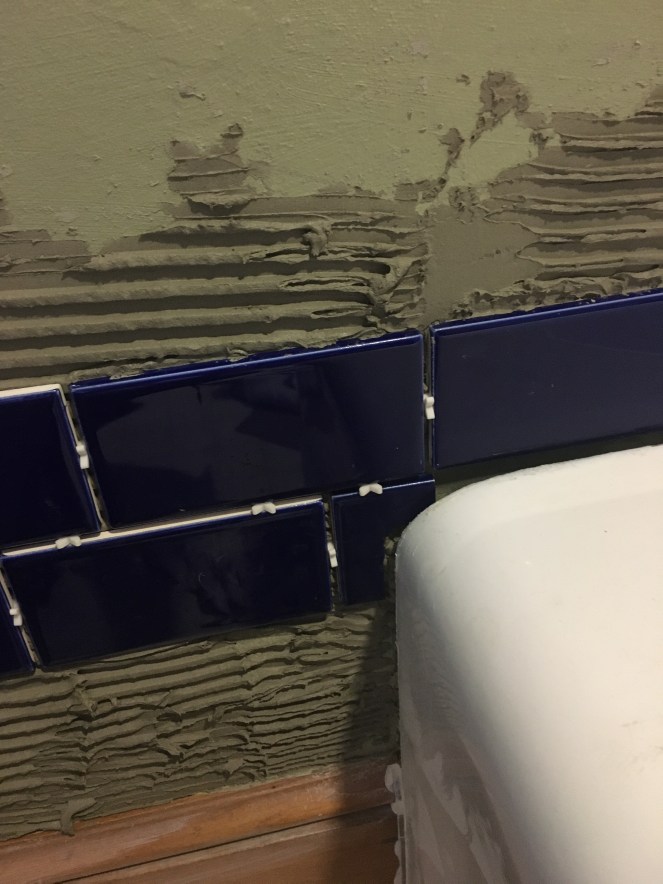
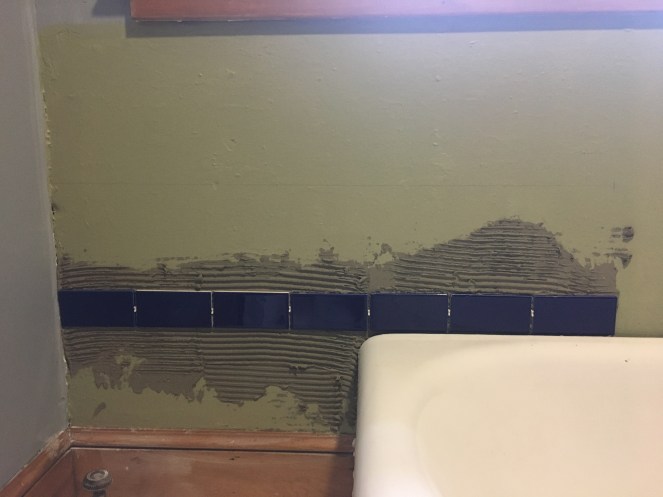
This was my first tricky cut, to go around the corner of the tub there. I was very pleased with it!
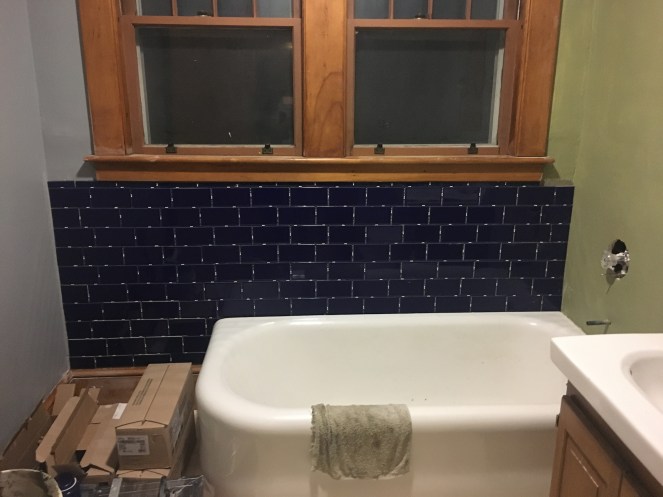
Here’s where I left it off at the end of the first night, my first time ever tiling! Finished this up around 9pm.
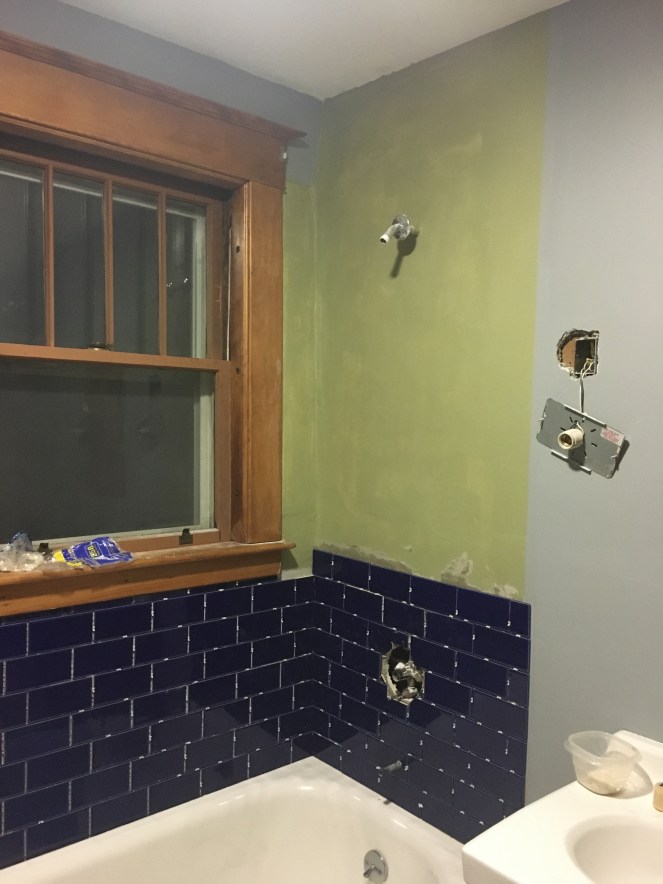
Day 2 went slower in some ways, faster in others. Slower because there was more wall – and more complicated things to cut around. Faster because my husband helped, so I had him cutting while I set things in place.
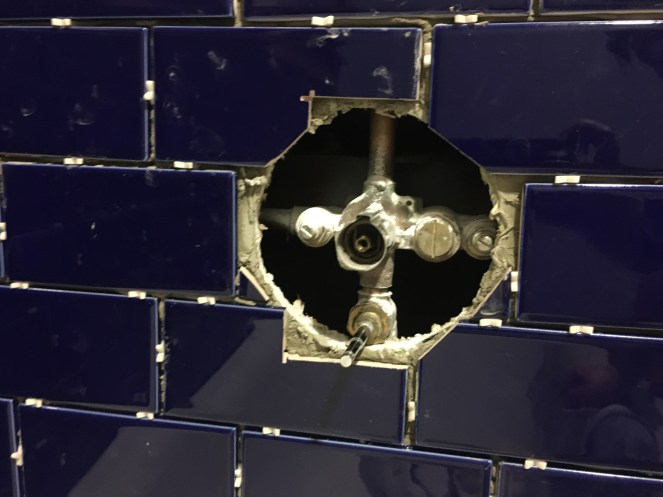

I bought a $30 drill bit just to do that hole. TOTALLY WORTH IT, WOULD DO AGAIN, IT LOOKS AWESOME.
Tiling done and ready for grout! Finished about 9pm on day 2.


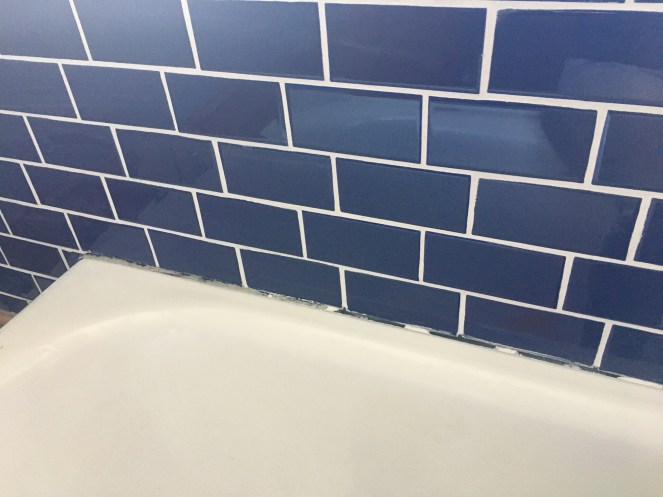
And on to the grouting. Division of work for that was husband applied, and then I tidied up and sponged it off. This was grout that the tile guys insisted was the best and I did not like it. It did not have the thickness that all the internet tutorials said grout should, and was sloppy and loose to get to really stick in. Then when it started hardening toward the end it got really tricky to work with, so some of the grout work around the showerhead is sloppier than I would like.
The tile guys were also horrified that I chose white grout with the dark blue tile, but I held my ground and I have no regrets. (Not about color anyway. I am a little confused still about how thick the grout lines ended up being? I had 1/8″ spacers and wanted a thinner grout line; the final line is much more like 1/4″. It doesn’t look bad necessarily just not quite what I was imagining.)

Grouted! Where the sunlight hits gives you a better idea of the true color of the tile. Still thrilled with it.
My idea of hell is caulking tubs all day. Took about 3 hours to get all the lines just right, but attention to detail really paid off here.
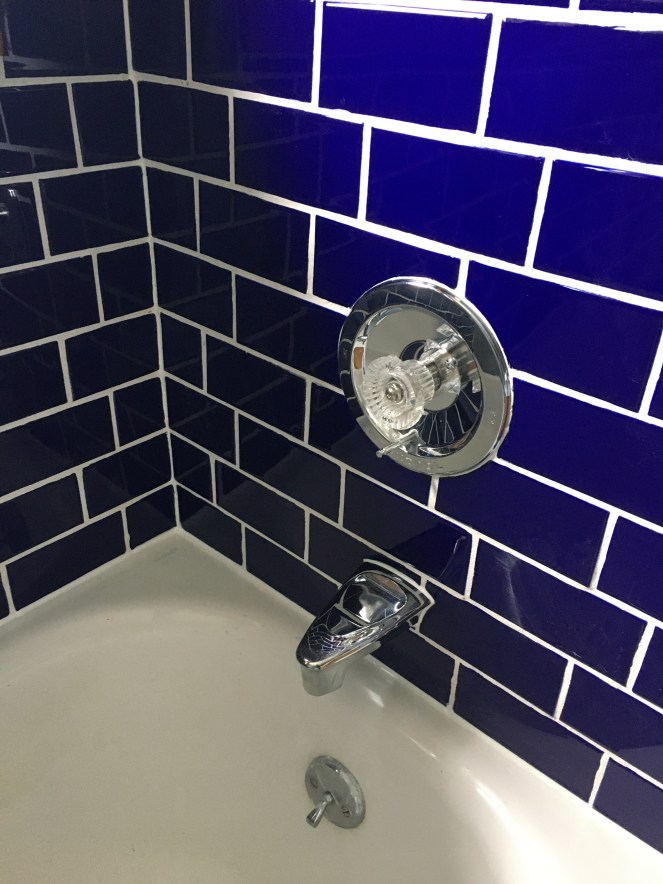
Still REALLY happy with this picture. Happy sigh.
Okay, on to the next problem. I was no way going to drill holes into my lovely new tile, so the previous curtain surround we’d used was out. When I googled shower curtain hangers that hung strictly from the ceiling, they were upwards of $200. HARD NOPE.
So…I got inventive, and made something out of plastic piping. This is still what’s hanging in there. I figure we’ll live with it for a while and then decide whether to a) spray paint it gray to match the other fixtures or b) replace it with metal piping.


I am also very pleased with the shower curtain, an Amazon find that is cheap and will not last forever but has already given my husband and I one good jump scare each, so, worth every penny.
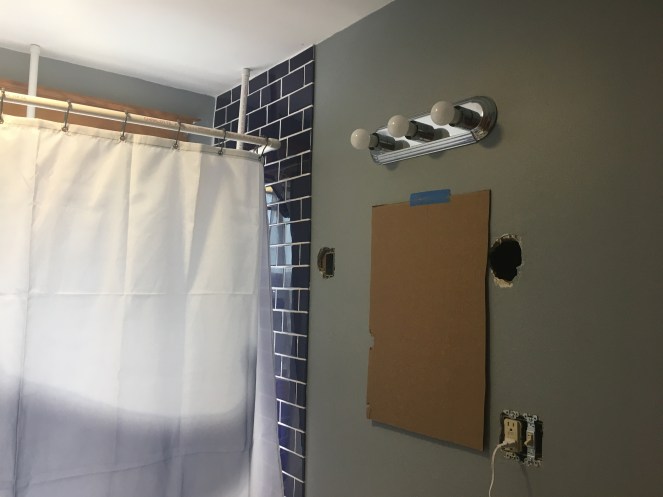
Okay, on to the next problem: lighting and mirror! The old lights were these ugly sconces that were off center and uh, not actually hooked to boxes on studs, yikes. I knew they were going pretty early. We had the electrician do a half-day’s work and rewire the system in the bathroom as well as add a bunch of things to the basement, about which more later. The new fixture, with these bulbs, is INCREDIBLY bright and not for everyday but is great for when you really need to stare at your face in extreme detail.
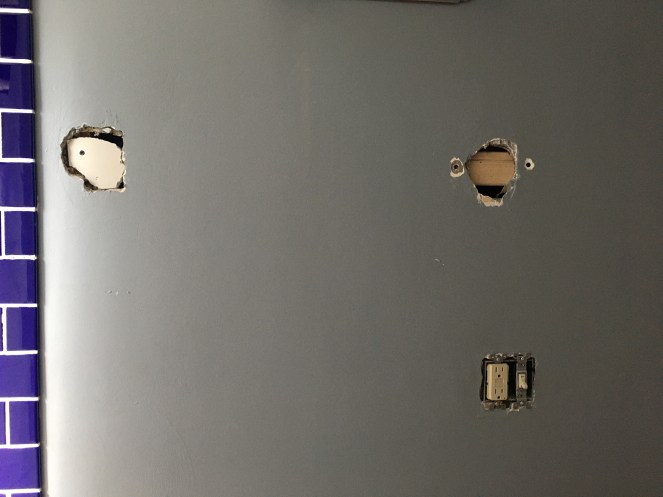
That left holes…to be filled with some bracing and drywall inserts, as you can see.

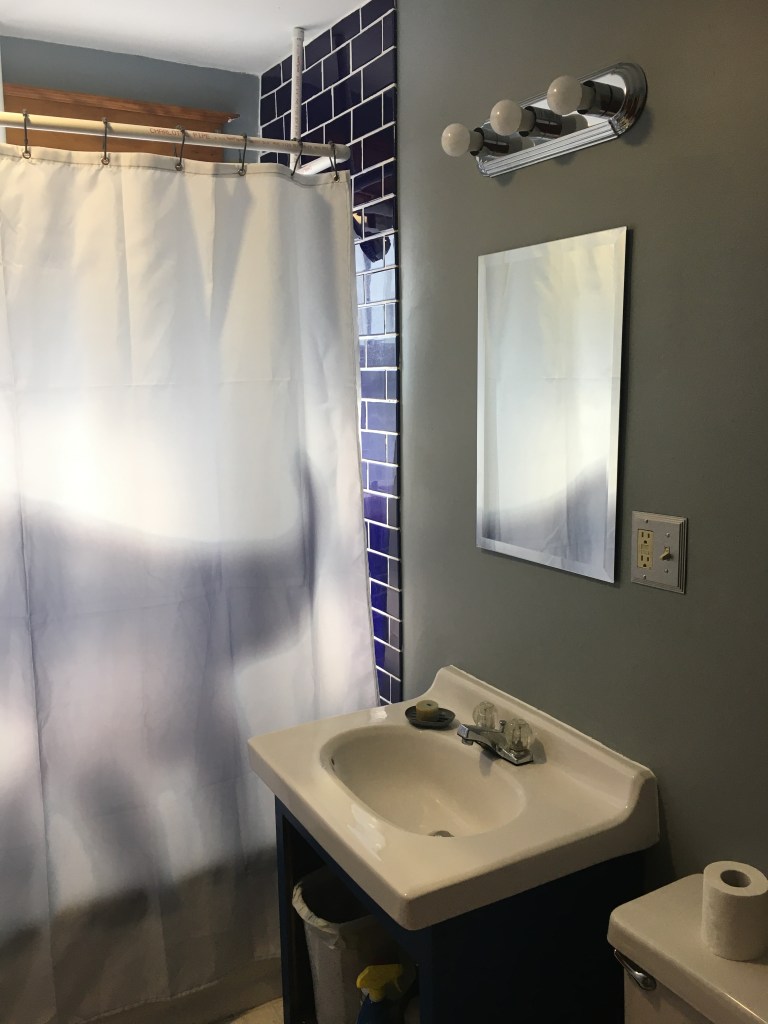
Aaaaaand a new mirror in the space!
Next up: the vanity, which was ugly fake wood. I tried one color sample and then swapped to another to match the tile. Unfortunately, I also swapped the handles & hinges, which I don’t regret in concept but do regret in execution, because now the doors don’t closer properly anymore and I can’t quite muster up enough fucks to fix it, since it would require taking the doors off again, filling & repainting the hinge holes, and then going on a non-local hunt for hinges. (I went to three different local hardware stores to find the ones I bought.)

And that brings you up to date on the bathroom renovation!
Still to do:
- towel hangers (have all the pieces, just moving slowly)
- toilet paper holder
- floor??? (have to price it out and also commit to a date with installers, both of which will determine how much I even want to do it)

I really love that blue tile and the white grout! But based on my kitchen backsplash, you probably already know I’m into that nontraditional look 😂 I think it looks FAB!
LikeLike
Love how it came out! That blue is gorgeous!
I changed out the knobs on my bathroom cabinets, but didn’t think to do the hinges. So now they don’t match and it annoys me so much. Not enough to fix it… just enough to look at it and be annoyed every day.
LikeLike