house post

House Project: Boring But Necessary

I feel like 75% of the stuff I do around the house falls into this category. Yawn, I dragged all the branches from the yard to the burn pile. Yawn, I ran all the refrigerator shelves through the dishwasher. And so on.

This one definitely falls into that category.

It’s part of the neverending garage project. See, around the framing of the garage door itself there were a lot of gaps. The largest of these was above the door. I did some investigating and found that at some point the previous owners had shoved old curtains into that gap.

Let us never again discuss the disgustingness of 40+ year old curtains that had then been shoved into a random crevice in a basement and left for another 20 years. BLERGH. I half-wish I had taken pictures of them so you could’ve seen the rotted, dusty, dead bug awfulness.

Once I removed the curtains, I could see daylight through some pretty good cracks where they…I don’t know, hadn’t framed the door right? Maybe the house settled funny? Who even knows. This house is such a weird mishmash of exceptionally well done upgrades and total amateur hour bullshit.

Anyway, this was a pretty short and sweet project once I finally got off my ass to do it. I used this stuff; it was $5 a can at the local lumber yard.

There was a little bit of a learning curve in getting it aimed, seeing how it would stick, and seeing how much it expanded, but honestly – within 20 minutes I had that gap perfectly filled and airtight.

Easy peasy!

Last winter, when you walked by the garage door you could feel a bitter chill coming in from these gaps. The one last piece of the total puzzle is a new rubber sealing thingamabob for the bottom of the door. I bought that a while ago and just have to put it on – that will be another good short project in coming weeks.

So, here’s to no more icy drafts in that corner of the basement!

house post

House Post: Patching the Bathroom Ceiling

Not the most exciting project, but one of those that makes the house feel a little more finished.

See, when we did the electrical work we wired for two ceiling fans, one in each bathroom. My father and I put the one in the upstairs bathroom in place, and the downstairs one came about months later with the help of a handyman, who also vented the upstairs fan with me.

When we put the upstairs fan into place, we didn’t realize that it came apart into as many pieces as it actually did. So we cut the hole bigger than was strictly necessary for the fan to fit in. Result: a gap around the fan. There was also a hole from the old light fixture.

For about 14 months, then, the upstairs bathroom ceiling looked like this.

The fix was a two part piece of work. The straight-up hole had to be braced with another piece of sheetrock and then mudded over, and the hole where the light fixture was had to be just mudded over.

So part one: patching the sheetrock. That required going up into the attic and working from above.

I had actually saved part of the sheetrock that we cut out, because the sheetrock used throughout the house is not normal. It’s an older form of the stuff, that has a basic concrete core (yes, really) and in this case it also had a thick layer of plaster over it. So it was both thicker and sturdier than modern sheetrock.

Unfortunately, that meant that it did not cut or break like the sheetrock I was used to, so after several attempts to get a piece that would fit into the gap, I was left with just a pile of broken sheetrock.

On to Plan B: using some of the endless scraps I have in the basement left over from the wall project. That went much more quickly, and after quite a bit of trimming I got a piece that dropped into the gap easily enough.

Then, I found a scrap piece of 2×4, also left over from building the wall, and because I didn’t want to actually trim the thing and it was so close to fitting, I hammered it into place.

It wasn’t going anywhere short of an earthquake, but I put a couple of screws diagonally and down into the floor beams anyway.

Next step, going back underneath and screwing up from the new piece of sheetrock into the new wood brace. I put one of the screws through the fan itself, though it was already quite secure, just to be extra careful – it was easy enough to just move a screw half an inch to the right and get some extra solidity.

Then: bring on the mud!

Two layers for the patched area, and three for the hole leftover from the old light fixture, with sanding in between. This was mostly a matter of hurry up and wait. 24 hours to dry a coat, 5 minutes to sand it down, another 5 minutes to apply more plaster. I could’ve done it in three days but there were a few evenings I opted out on account of laziness. So this past Friday night I did the last sanding and put the light back in place and voila!

The real last step is to repaint the bathroom ceiling but that’s not happening. I might use some of the paint from the downstairs bathroom ceiling to patch these pieces really quickly, but it won’t match exactly. Until we redo the entire bathroom, I’m not going to repaint the entire ceiling.

house post

House Post: Best Laid Plans, or, One Step Forward, .999999999 Steps Back

We rewired the house last July, but I’m still working on the various pieces of things leftover from that.

One of those things was the dining room chandelier. We had taken it down as part of the rewiring, and then it looked like it was old, bad wiring, so we left it down. About a month after that, I had time to examine it more thoroughly and it was fine! Someone had just done a dumbass patch job that they didn’t even need to do – basically they thought they didn’t have enough wire to reach the ceiling box, so they spliced in some extra inches very badly, and after who knows how many years that had started to fray and come apart. I just yanked that extra wire out, the original wires were in fine shape, and with some careful maneuvering and help from a friend, put the fixture back up.

Except.

It was a very old chandelier, and it was in many pieces down a central column. Each piece was held together in a slightly different way, mostly variations on several long hollow screws. They were all precisely measured, and try as we might, we could not get them to all work together to allow the fixture to look and hang normally again.

(this is where I’d put a picture of that crooked chandelier if I had thought to take a picture of it but alas I was not that smart_

After a while, we just left it as best as we could, and so the fixture hung crookedly for about a year. Also, sort of from the wires which was obviously less than ideal and okay, fine, kind of dangerous, but you had to be there to realize just how maddening trying to get that puzzle right was.

Anyway.

I finally got sick of staring at it, and started to think about how I could fix it, when I was at the hardware store looking for something I discovered two things.

1. Those hollow screw things are called “lamp nipples.”
2. You can buy them in all sorts of sizes!
Well, boom. I took the fixture apart, found the one that was the worst offender, went to the hardware store, and bought one that was 1″ longer. Old one is on the left above, new on the right. $2.52 with tax, sweet!
Then I put the fixture back together, and hung it back up and lo, it hung straight and beautifully.
Then I flipped the light switch.
And there was a loud POP with a sort of echo-y fizzle, and the light turned back off.
Fuck.
Other lights were on, so it wasn’t the breaker. I went to bed grumpy and feeling like a failure and the next morning got up, flipped the breaker off, and proceeded to take apart both the switch (totally fine) and the fixture itself (no obvious scorch marks, melted wires, etc).
Stumped, I put up a bulb in its place, and that turned on just fine. So…the fixture was dead. I must have tweaked something in all the twisting and movement that I had to do to take it apart and put it back together.
On the one hand: it’s kind of dated, and was slated for replacement in 3-5 years anyway.
On the other hand: GOD DAMN IT.
So, we lived with a bare bulb for a week.
Wicked classy look.
Then we ordered a fixture off of Amazon for $75, because we are Millennials, and honestly there was ZERO room in the budget for the ideal perfect fixture right now.
And that’s the story of how I accidentally installed a new dining room chandelier.
house post

House Post: Basement Organization

First things first: I’m still alive! And I have been doing quite a lot. I’ve even been writing blog posts in my head, which I guess doesn’t count?

Anyway, back into the swing of things. The summer heat has broken in Vermont, it was in the low 40s overnight, and we just got back from a two week vacation, about which more later. So I am itching to DO things again.

Organizing the basement is a nearly-endless quest. I’ve made some huge steps, though.

Previously, we moved over the old huge shelving and made room for extra kitchen things.

That still left a whole lotta basement to organize.

Then there was this, in what we call the root cellar, a little adjacent room in the cellar. GROSS. After months and months of trying to make myself use it, I just could not. So I put it up on our local email list called Front Porch Forum and it was gone within 12 hours.

The guy who picked it up was amazing. He had it dismantled and I helped him carry it out and then he hauled it away with his Miata. I could not even.

The rust stain left behind should give you some idea of how gross that shelving was. Also, the walls will give you an idea of how badly I want to repaint all of the basement walls.
And finally, here’s what that corner looks like now. Progress!

house post

House Post: Back Bedroom Update

When last we left the back bedroom, a whole army of friends had stripped all of the wallpaper.

They were enthusiastic but not very detail-oriented, so there was still a fair bit to do.

Chiefly, I had to remove the little snagged bits of wallpaper left, and wash off the wallpaper glue. This worked much more easily than it had in any other room. I filled a bottle with half vinegar, half water, and a squirt or two of Dawn dish soap. I sprayed that on the wall, let it sit for a few minutes, and then scrubbed with a sponge dipped in hot water. Rinse the sponge, so on and so forth. It took a few days, doing one wall a day after work, but it wasn’t hard work. I could have easily done it in a day if I had time.

clean walls!
Next: patching. I get kind of fanatical about patching, and this room in particular had a loooooot of little patching to do. You can see one of the holes in the photo above, leftover from the electrical work. So this took a few more days, because a layer of patching has to dry up to 24 hours before you do the next layer.

Next up: priming. Every wall gets primed with oil-based Kilz primer so that I can be neurotically safe and sure about any wallpaper residue.

Then, color: Sherwin Williams “Sand Dollar” which does not come through in photos but is essentially a warm beige. I kind of wish it had been a shade or two darker, but this is the darkest room in the house, so – it’s probably good to stay light.

The last phase was supposed to be pulling up the carpet, but, well…

Oh yes, someone glued down linoleum over the gorgeous maple hardwood floor. Yeah. YEAH.
So I promptly put the carpet back down and set it aside for another day. Well, after yelling a lot and wandering around in a daze of heartbreak.
I am feeling a smidge better because as you can see in that last picture, the glue has dried up quite a bit and it might be possible to take it all up without damaging the floor too much. Before I dig into it, though, I have a call in to get it tested for asbestos. Never dull!

house post

House Post: Raised Bed Construction

Though I have not been blogging, things are still going on. I’ve wanted to construct raised beds for gardening for some time now; last summer, I stuck to container gardening in Tristan’s old supplement buckets on our porch. That worked okay – I got some good tomatoes out of it, but it was less than ideal.

So for this summer, I went off into the deep end, of course.

I started almost everything I grew from seed. I bought High Mowing seeds from the local coop, because Vermont. They’re organic and mostly heirloom varieties. I had never started anything from seed before, so it was an adventure. Here they are on the sleeping porch, after spending the colder months (March, April) in the library next to the window. I didn’t use a grow lamp, just a little greenhouse thingy with a plastic cover to trap heat and moisture. I was continually surprised by what sprouted when, and how that has not necessarily correlated to what’s doing well now. I have absolutely no scientific evaluation of any of this. Just watching them and shrugging a lot.
Two exceptions to starting from seed. First, broccoli, because there was a mixup at High Mowing and what was in the broccoli packet I bought was actually cabbage. To atone for that, the coop gave me another packet of broccoli seeds, a packet of any seeds of my choosing, AND a flat of Cate Farm (also local, also organic, VERMONT) broccoli seedlings. Since it was awfully late to be starting anything, I just planted the broccoli seedlings and set aside the seeds for next year.
The other exception to growing from seeds was peppers. Nothing I could do would make them grow at anything beyond a sluggish rate. They took weeks and weeks to come up, and then they just never thrived. So I bought two pepper plants and put those in the ground instead. They’re still not doing great. I’m not entirely sure what’s going wrong.
Now to the actual raised bed!

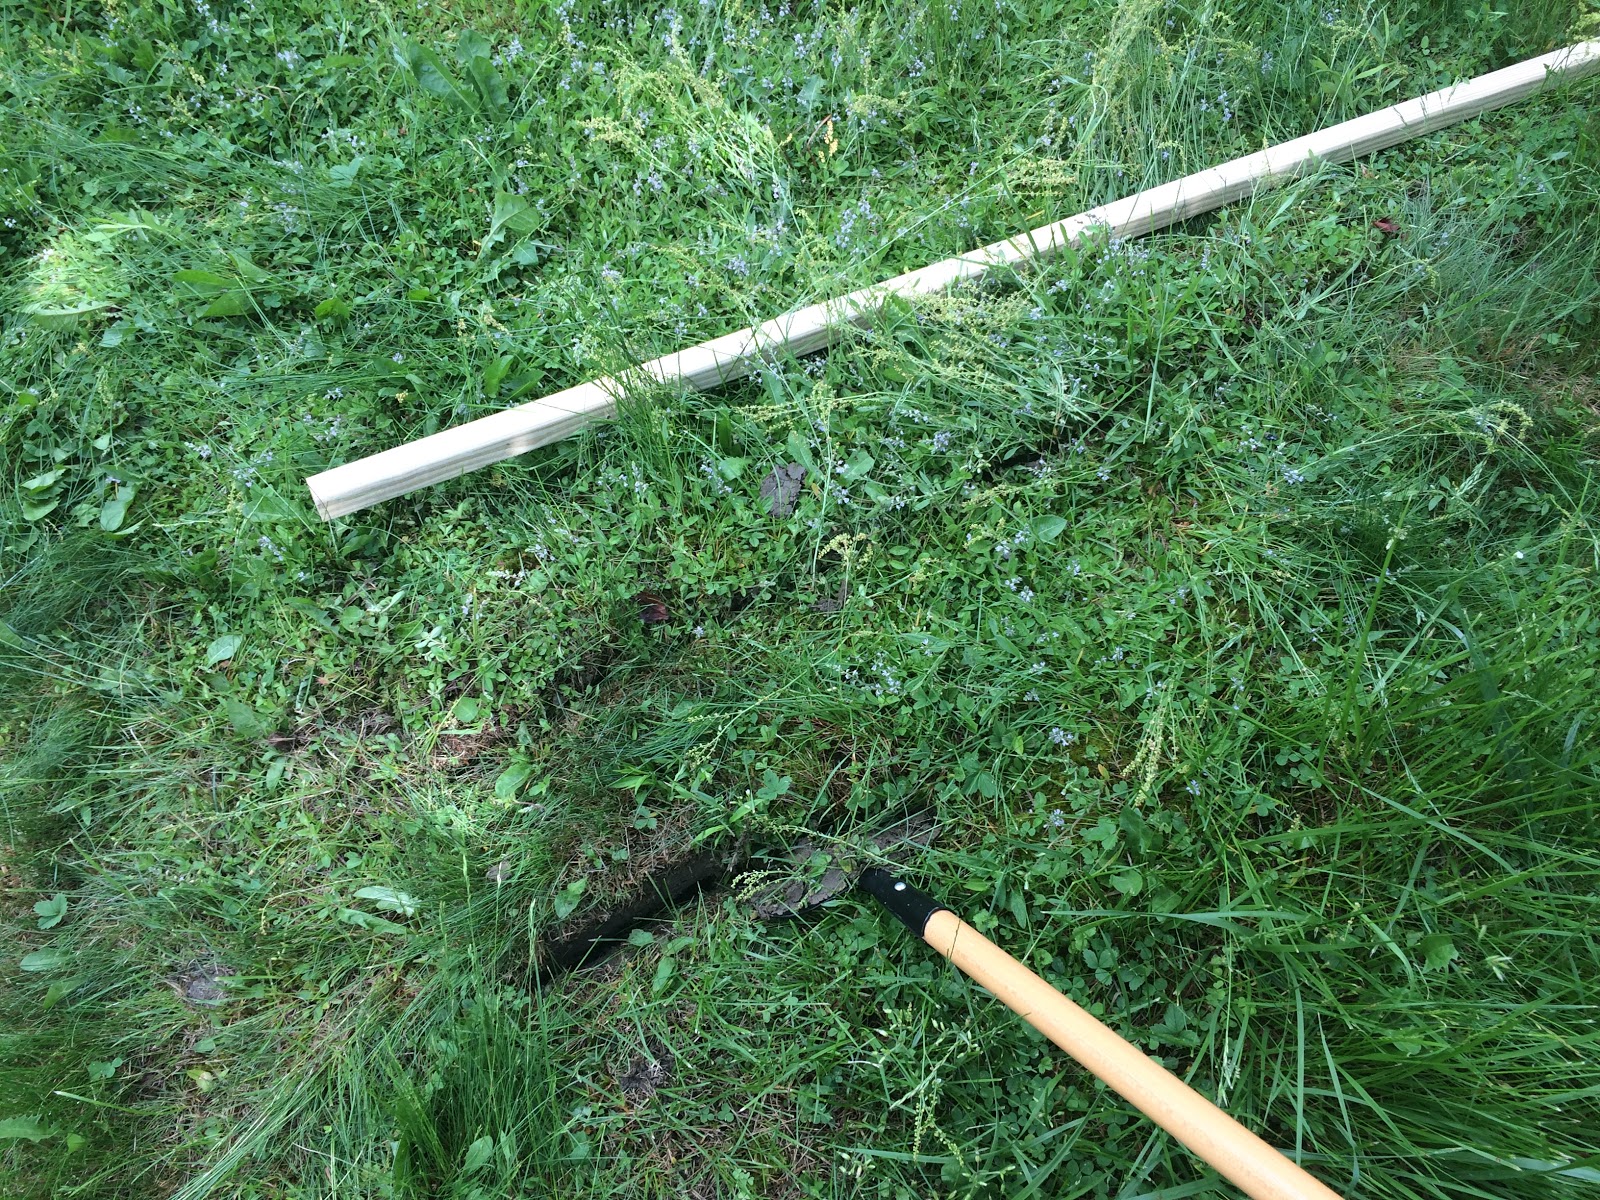
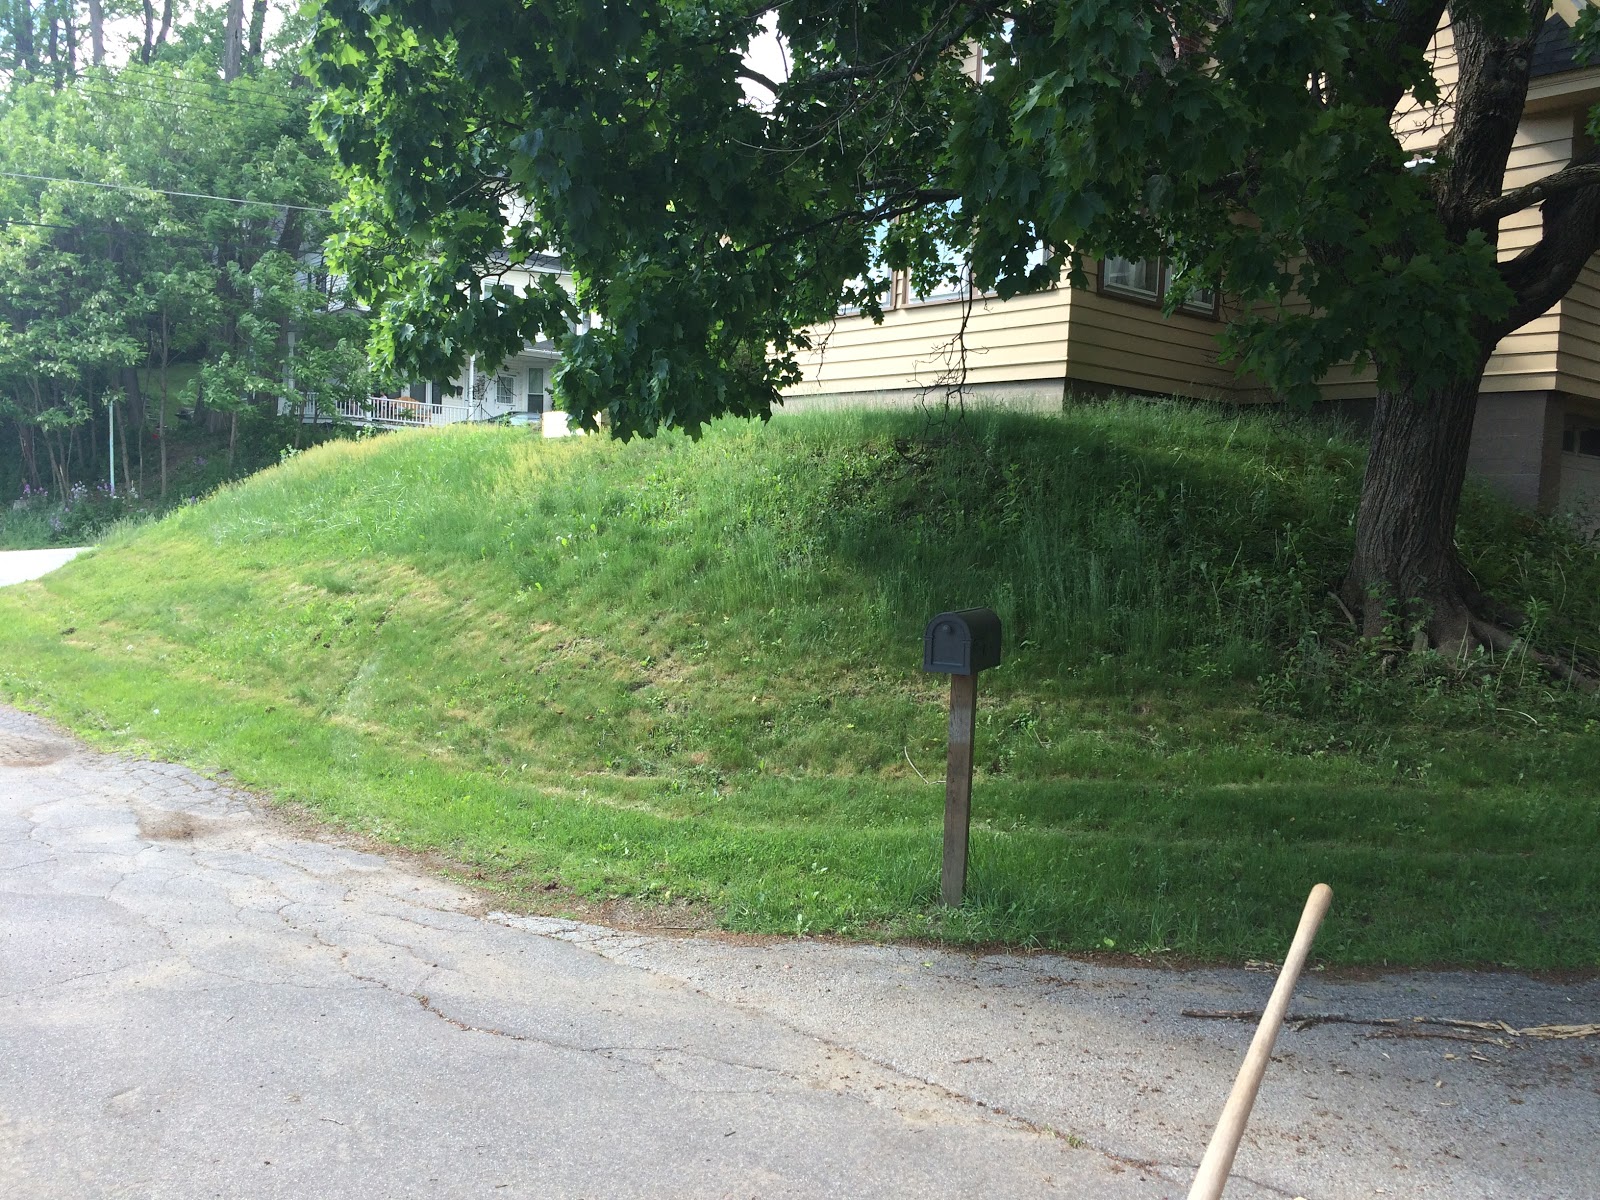
Step 1 was to site the bed: this is at the south end of the house, on a very steep hill, just outside of the sunroom. It gets the most sun exposure – much more than the backyard – and drains well. The grass is crap anyway, and tough to mow. The longterm plan is actually to terrace this entire hill but that’s a few years away probably.
So I cut up the sod and dug it out. This was physical labor but not nearly as bad as it could’ve been. It took maybe an hour to an hour and a half. It was just slow steady work. The sod was of good quality and the soil was too, and I had the right tools.
Yeah, see how steep and awful it is?

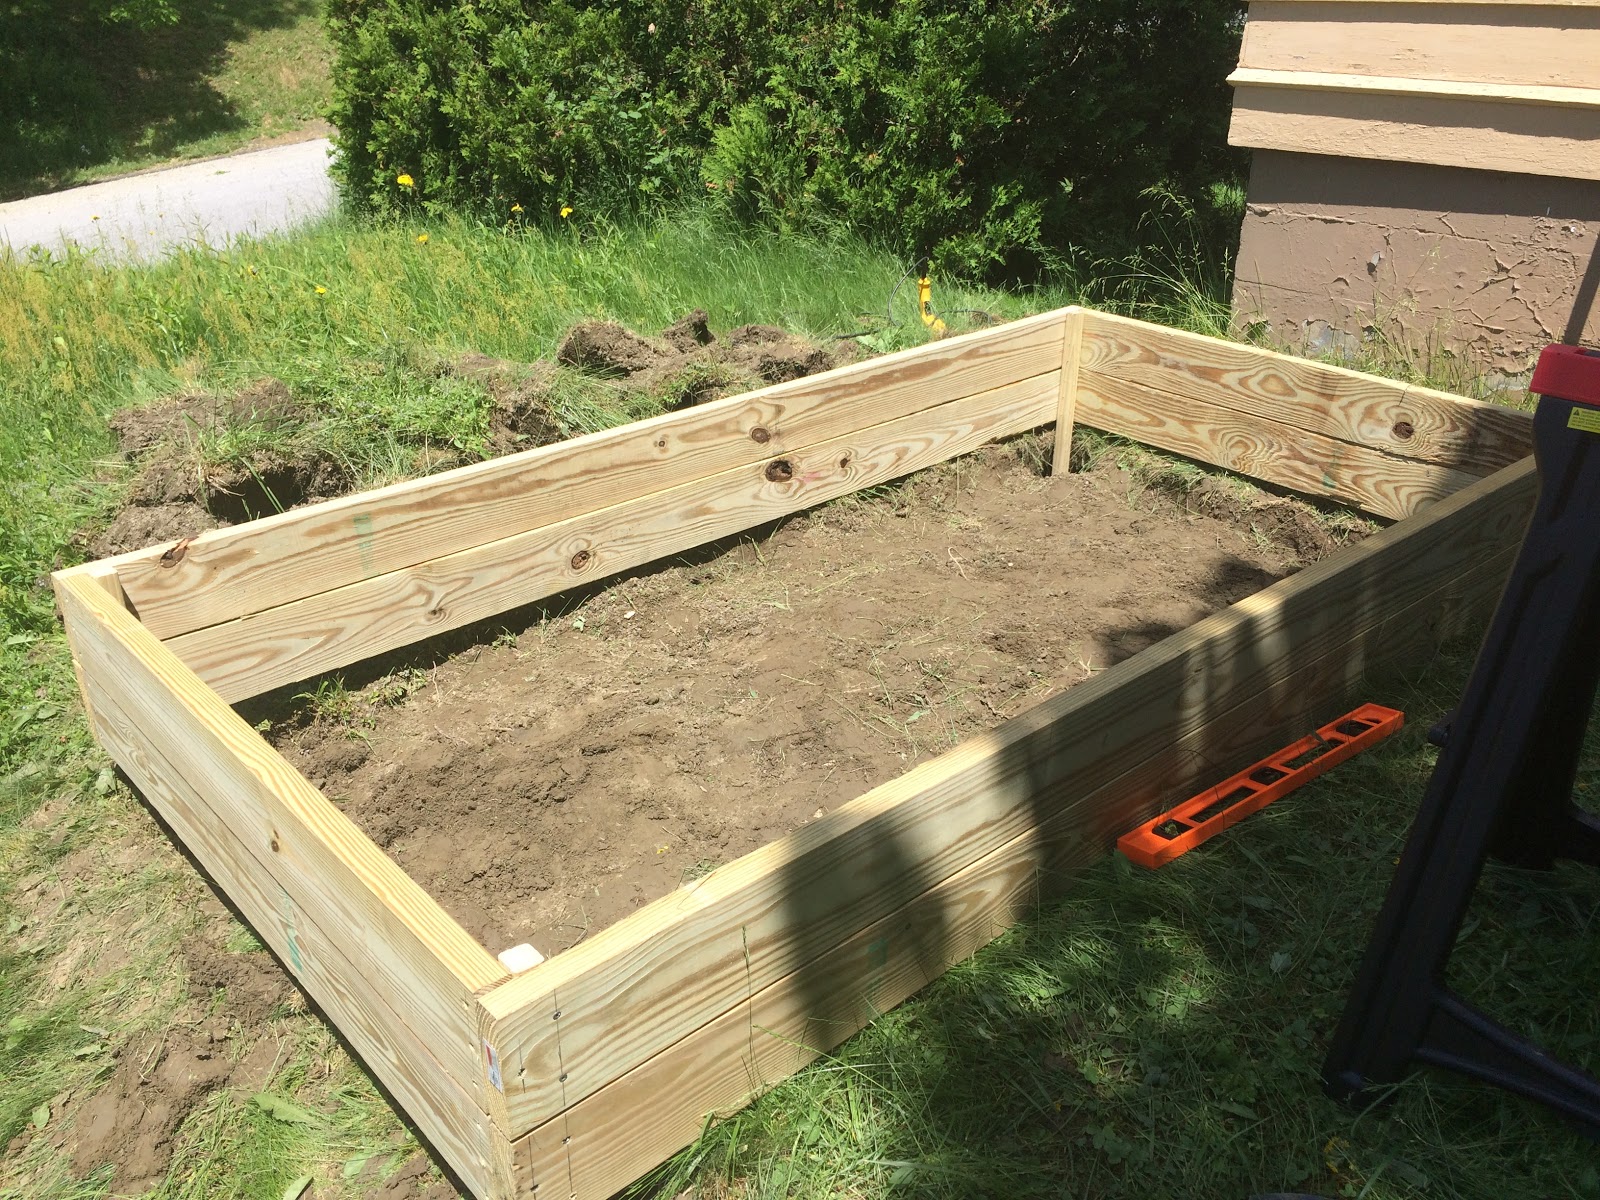
Step 2 was to build the raised bed itself, and get it mostly level. I priced out cedar and hemlock, and went with pressure-treated pine instead. These are 2×6″ boards, with 2×2″ braced posts at the corner, dug 12″ deep into the ground. The whole structure was incredibly heavy and pretty darn sturdy. It’s not the prettiest, but I’m looking forward to it weathering up (it’s already started) and silvering and generally blending in much more to the hillside.
(as seen in pictures I can take little to no credit for the very careful measuring and squaring up of all the parts. that was all my father the engineer. I probably would’ve just started screwing things together and then despaired when it was too hodgepodge to stay flat or survive the summer.)

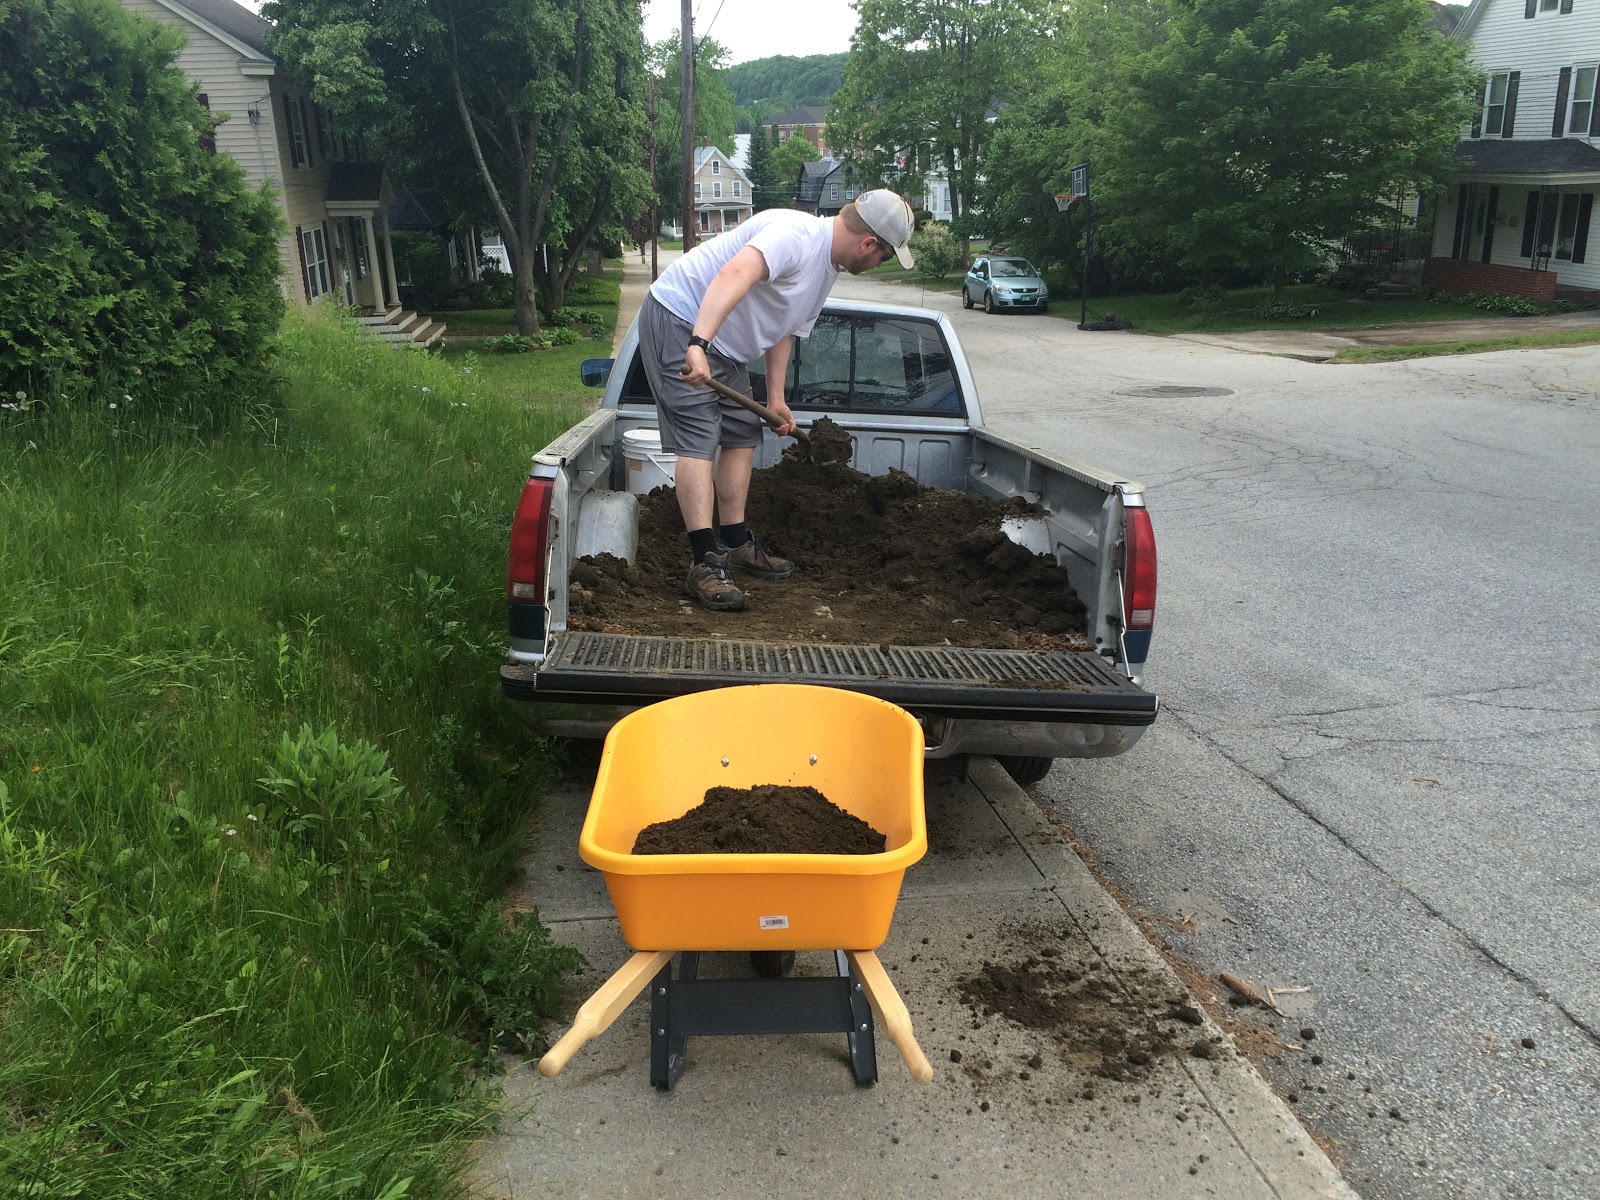
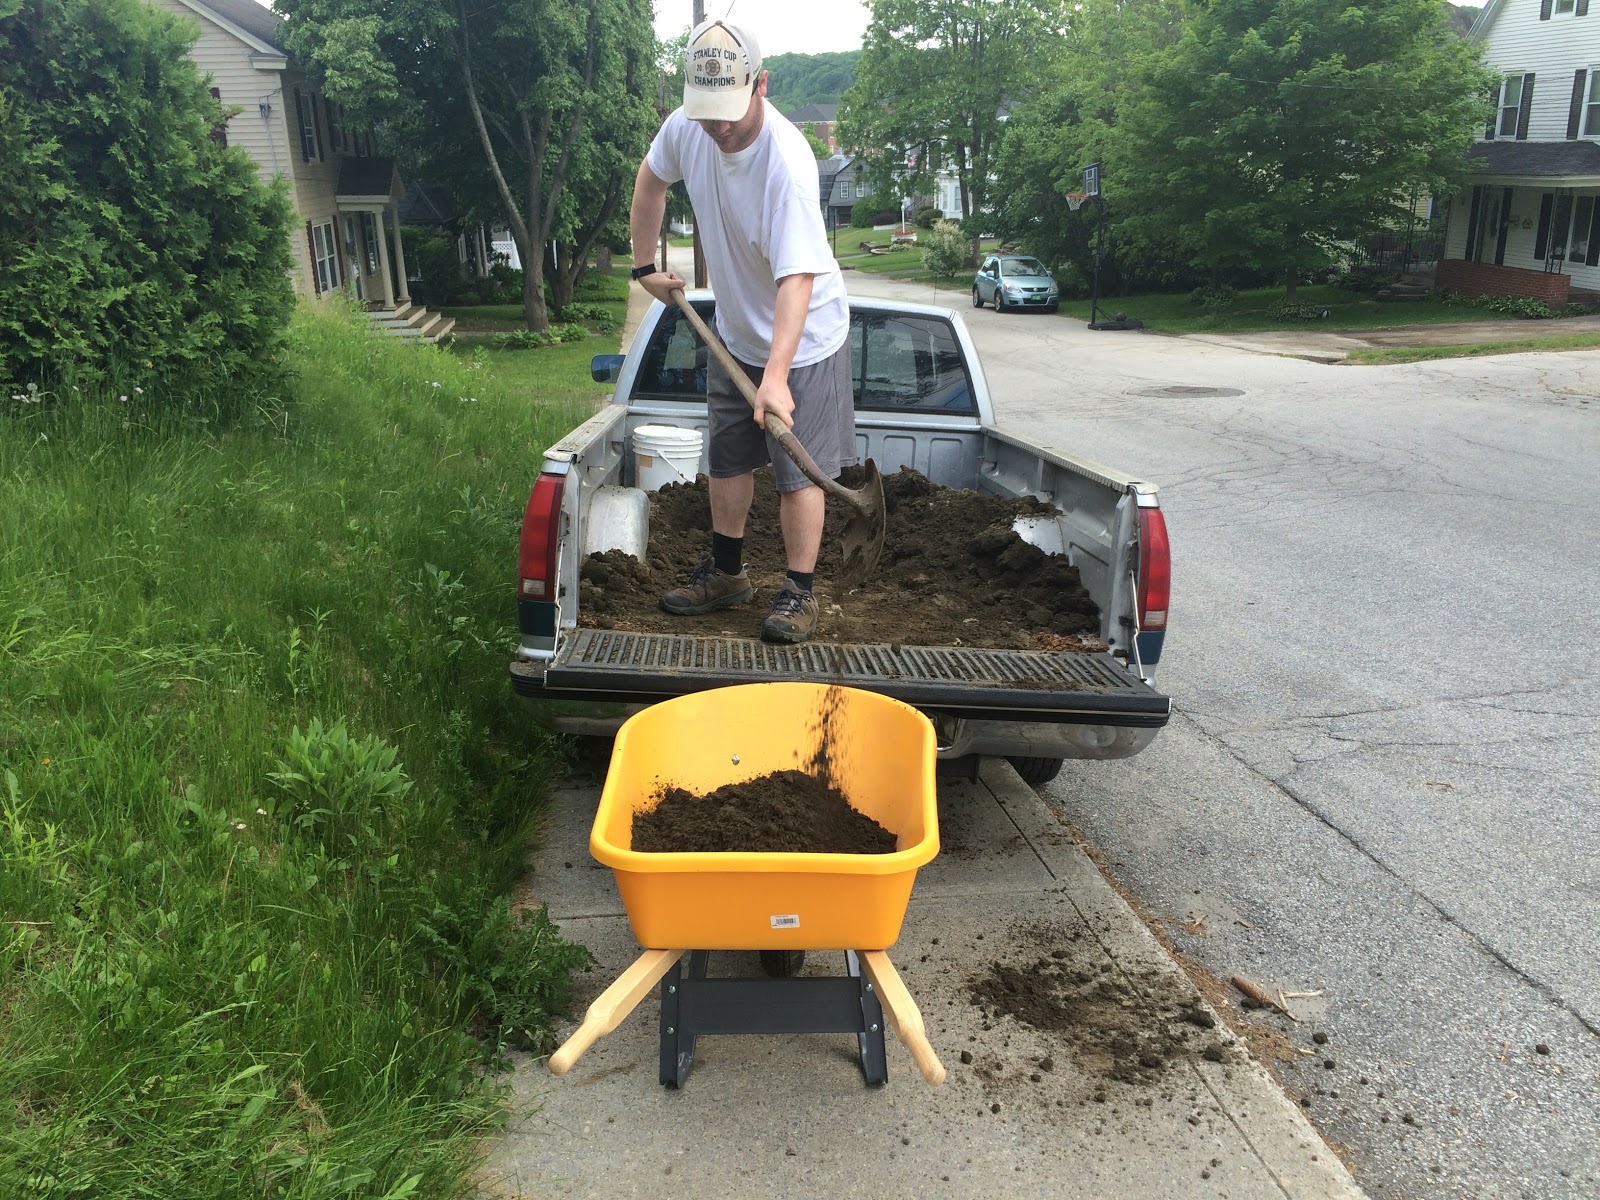
Step 3 was the WORST. The ACTUAL WORST. One cubic yard of topsoil, dumped into my truck at the garden yard, and then carted up the hill to fill the bed. 12 wheelbarrows full. I am no stranger to wheelbarrows, ok? No one who has a horse is. But filling and then unfilling that much solid dirt, not to mention getting it up that damn hill, over and over again? My blisters had blisters.
I mixed in 1 cubic foot of compost, but wish I’d done much more. I didn’t do anything thoughtful or scientific with the soil. I just bought a bag of local, organic compost and mixed it into the topsoil as best I could. I wish I’d bought more. Maybe next year in preparation I’ll get the soil tested and make some actual decisions about the compost I buy and how I mix it in.

And final step! I had more seedlings than space in the bed, and I couldn’t bear to ditch them, so I ended up adding in containers anyway. Oh well.
Total cost ran about $100 for everything including the seeds and other supplies. Not half bad, considering $75 of it was for the wood and the topsoil, and so will not need to be repeated in future years – and another $15 was the seeds themselves, of which I only used half, so they’ll carry over to next year.
In the final tallying, I got tomatoes (three kinds), broccoli, cucumbers, zucchini, cabbage, sunflowers, and peppers.
After a frustrating hour or two, I discovered that nothing I could do made the faucet nearest to the bed work. I will have to call a plumber to troubleshoot what’s wrong and that’s not in the budgetary cards right now. So I ran our longest hose from another faucet on another part of the house, and spent a week or two watering by hand with the sprayer, and then bought a soaker hose and pinned it down between the plants. Now I just turn on the water for 15 minutes and then turn it off again and everything is thoroughly watered. I love it, especially since we’ve had such a dry summer.
Here you can see a picture I took on Friday night, with the soaker system in action. The tomatoes are starting to bud like crazy. The cabbage has been absolutely destroyed by some kind of bug, which is not a terrible loss. I didn’t intend to plant it – that’s what was in the seed packets that I thought were broccoli. The broccoli is…doing ok. It’s getting attacked by some kind of worm. I need to get netting for it to keep them away. I lost all the zucchini in transplant, and the peppers still aren’t thriving, but after a tough few weeks the cucumbers and the sunflowers have pulled through very well.
I think we’ll build a second raised bed next summer right next to this one and branch out a bit more in types of food grown – this has been really pretty easy and rewarding! Even the weeding has been minimal, I think because of a combination of location and of the brand new soil.

house post

House Post: New Front Porch Lighting

When we re-wired the house, we discovered that the previous front porch lights were DONE.

you can sort of see them here, to either side of the front door.

They were probably original to the house, c. 1928, and the insulation on the wiring had melted off. The metal of the lights themselves was done. Kaput. Unsalvageable. How they had not simply disintegrated off the front of the house or caused a fire is a mystery to me.

YEAH.

I found new front porch lights that I loved in, of all places, HGTV Magazine (I KNOW), but they were hundreds of dollars apiece. I showed them to my in-laws when they were visiting and my father-in-law, who loves a challenge, emailed me a link a few weeks later to some very similar lights for $120 each. Sold!

Then the project kept languishing. See, the previous lights had simply been screwed on to the front of the house without regard for the slant of the siding. That was reasonable because they were dangling – they would right themselves via gravity. That was not the case for our new lights.

We hemmed and hawed and debated and bought 2 different versions of mounting blocks that seemed like they might fit over the siding but were the wrong size and I tried to hire our handyman guy to do it but a) he was booked months and months out and b) he really thought I could do it myself. I guess I gave him way too high an opinion of my competence during the ceiling fan project?

In the meantime…basically we had bare bulbs hanging on their wires off the front of our house. For a long time. They were under eaves so it wasn’t a huge problem but it was still Not Good.

Finally, FINALLY, I put it to the top of the list for my parents’ next visit, and my magical father brought all his tools and put up our new lights.

Step 1: Cut out the siding down to the actual wall of the house.

Yeah the lights have been sitting there since we bought them 10 months ago apparently I have no shame.

Step 2: Devise a complicated mounting system with pressure treated blocks and carefully measured pre-drilled holes. Swear a lot. Ok, that might just be my dad’s step 2.

Step 3: Put up the block itself!

Step 4: Wire in the lights.

Step 5: Ooooh and aaaah over how pretty they are.
Step 6, apparently not pictured: Caulk around the edges of the new mounting block just to be safe about moisture getting under the siding.

Step 6: Realize there’s zero reason for the old mail & newspaper boxes to be there since we put in a new mailbox down on the street. Remove them. Vow to pressure wash the house at some point this summer, gross.
In short: I love them!
house post

House Post: Kitchen Painting

So, previously I shared the project that was re-plastering the walls of the kitchen to cover holes large and small.

Once that was complete, it was time to paint!

Most of the reason for repainting the kitchen was to freshen it up. First, the wallpaper removal had left a sort of ugly bit around the top edges of the walls – either the scrapes from the removal or the tacky discoloration left over after the glue. Second: it’s a kitchen! The walls were spattered and stained after 30 years of use, even with regular washing.

Color #1, a very pale creamy yellow, was not a success. It was a lovely color but did not work next to the cabinets or next to the almond formica. The formica will not live forever, but it was bad enough that I didn’t want to be pushed into replacing it out of sheer desperation.

Color #2 was much better, if much more bland! A very pale cream that mostly left the walls feeling fresh and, bonus, made me realize how dated the previous wall color was – it, too, was a variation on almond.
After repainting, I also updated all of the switchplates, and put in foam insulating things behind them to cut down on drafts.

I could not be more pleased with the upgrade. It was a relatively quick and easy project, despite how long I dragged my feet in between stages, and the difference in the feel of the kitchen is huge.
Next up for the kitchen: new curtains and new under counter lighting. Longer term, a new exhaust hood for over the stove.
POM POMS YEAH.

Let us not discuss how ugly and disgusting those lights are.

house post

House Post: Kitchen Plastering

Consider this step 1 of the kitchen repainting project.
After we rewired the house, there were a lot of holes in the kitchen: four in the ceiling, and then some miscellaneous extra holes – around the light switches, for example, and from the old screw anchors for the old CO alarm.
(ok there were – and still are – a lot of holes everywhere, 22 remaining by my count, but the kitchen was a place to start, anyway)

Step 1: use these mesh thingies over the big holes. The holes are about 4″ in diameter, and these squares are 6″x6″.

Step 2: Cover them pretty roughly with a thick, no-frills layer of plaster.

Step 3: After waiting 24 hours for it to dry, sand down the rough plaster. Use the nifty sanding thing that attaches to the vacuum because plaster dust gets EVERYWHERE.
Step 4: Another layer of plaster, with a slightly wider putty knife for smoother lines.

Step 5: Wait another 24 hours, then sand again.
Step 6: Yep, another layer of plaster, with an even wider putty knife, that I didn’t take a picture of, but it’s 12″ wide and the goal is big sweeping strokes for a minimum of edges or lines.
Step 7: Another 24 hours, another sanding! Hopefully this is the last one. Honestly, I could still do another layer on the ceiling but I ran out of fucks. It looks totally fine except on close inspection. My plan is to leave it alone until we get around to doing the rest of the kitchen renovations in mumblemumble years, and then do one last finishing layer before we repaint the ceiling.

Unrelated: I pulled legitimately 6-8 of these picture hangers out of the walls in the kitchen, WHAT THE HELL WERE THEY HANGING, BOULDERS?

Next up: repainting the kitchen now that the wallpaper is gone and the walls are replastered.

house post

House Post: Basement Storage, Part One of ???

This will be a very much in-progress kind of post, but let it serve as a marker. I’m slowly chipping away at solving our basement storage.

When we first moved in, the basement was the dumping ground. Which made total sense at the time, and I don’t regret it. But going down there was an exercise in claustrophobia and anxiety – at least for me, considering the contentment I get out of well-organized spaces with everything in its right place.

But over the winter and the last few weeks, we’ve slowly chipped away at that: emptying boxes and getting their contents put away, thinking through what should go where, buying new storage containers to actually organize things that would stay in the basement.

Several weeks ago, when we had friends staying with us (the same ones who stripped our wallpaper), I enlisted their help to move the giant shelving unit that sat just at the base of the stairs.

By giant, I mean probably 20′ long, 5′ deep, and about 4.5′ tall. That meant that it was basically too big to be usable for us. I’m honestly not sure what previous owners used it for – storage of things they never wanted to see again? For us, it just attracted clutter. I think the longterm plan will be to dismantle it and take it to the dump, but I can’t bring myself to do that quite yet.

So anyway: the shelving unit got shoved right.

Most of what’s on the floor was either a) on top of that shelving unit and moved so we could pick it up or b) has since been sent to its appropriate home. But it gives you a taste of what our basement was like and why I wanted to organize it!
Here’s the space that was left. This was taken standing at the very foot of the stairs. You can see the wall of the new garage on the left.

And voila! New shelving with surplus kitchen things on it. It’s easy to run down and grab less frequently used things (canning supplies, old dishes, the large crockpot for entertaining).
One of my someday dream frivolous projects is to pull everything away from the walls and have them sandblasted and then repainted all white. As you can see, our whole basement was painted white and pink and since that time (the 1970s?) moisture has seriously eroded the paint, which flakes away horribly if you so much as look at the wall. I used the shopvac on the wall before putting the shelving in (you can see the difference in paint between the empty pic and the shelving pic) but it just didn’t do enough. It got the major chunks, but that’s it.
There’s more storage stuff going on in other parts of the basement, slowly but surely turning it into a better space. Some problems haven’t been resolved yet (see the canoe in the top picture? yeah.) but many of them have, and if I just keep chipping away I think by this time next year it’ll be all set.